Functional 3D Printing: How to Design and Print Replacement Parts
Why Print Replacement Parts Instead of Buying New?
I got into functional 3D printing projects for the same reason a lot of people do—my vacuum cleaner broke. A small plastic clip holding the hose attachment snapped. The vacuum itself worked fine. Replacing the whole thing felt wasteful. Ordering a generic clip online would take a week. So I measured it, designed a replica in CAD, and printed it. It worked.
That pretty much sums up why printing replacement parts makes sense. The cost is minimal—just a few cents of filament and some electricity. You skip shipping delays. You get a part built to your specific dimensions, not a mass-produced approximation. And you keep another item out of the landfill.. For more on this, see our guide on How to Build a 3D Printed Drone: Materials and Setup Guide.
There are limits though. I wouldn’t print a brake lever for a bicycle or a gear inside a kitchen mixer that sees high torque. Safety-critical components need injection-molded strength and proper certification. For everything else—drawer clips, hinge pins, brackets, knobs, fan guards—3D printing is often the fastest and cheapest fix.
The key is knowing when to print and when to walk away. This guide covers the full process so you can make that call yourself.
Tools You’ll Need for Functional 3D Printing Projects
You don’t need a workshop full of gear. But a few specific tools make the difference between prints that fit and prints that end up in the trash.
Digital Calipers
This is non-negotiable. A cheap plastic ruler will get you close enough to fail. A $25 digital caliper from brands like Neiko or iGaging reads to 0.01 mm accuracy. That’s fine for almost every household part. Spend the extra few dollars on a set with a locking screw—it helps when measuring in awkward positions. Beginners who need a reliable pair will find many options .a href=”https://www.amazon.com/s?k=digital+calipers&tag=3dshopper-20″ target=”_blank” rel=”noopener”>digital calipers online.
CAD Software
If you’re new to 3D modeling, start with TinkerCAD. It runs in a browser, requires no install, and handles basic shapes well. When you need more control—accurate fillets, parametric dimensions, assembly modeling—move to Fusion 360 for personal use or Onshape for browser-based work. Both have free tiers that cover functional part design without limiting you.
3D Printer
An entry-level printer like the Creality Ender 3 V3 SE or Bambu Lab A1 mini can produce reliable functional prints right out of the box. You don’t need a multi-hundred-dollar machine. What matters is a heated bed, decent part cooling, and a community that shares troubleshooting advice. I still use a modified Ender 3 for most of my utility prints.
Filament
Standard PLA won’t cut it for most functional parts. You’ll want PETG as your baseline, with ABS or Nylon for higher demands. More on material selection in the dedicated section below.
Step 1: Measuring the Part You Need to Replace
Good measurements are the foundation of every functional 3D printing project. Get this wrong and nothing else matters. Here’s how I approach measuring a broken part.
First, take photos from multiple angles before you remove anything. If the part snaps during removal, those photos are your only reference for how it originally sat. I’ve learned this the hard way when a bracket shattered as I pried it loose and I had to guess the original position of mounting holes.
Use your calipers to record every dimension you can reach. That includes overall length and width, internal and external diameters, hole positions measured center-to-center, and thickness at multiple points. Don’t assume any surface is flat—plastic parts warp over time. Measure across corners too. Write everything in a notebook or a digital file immediately. I keep a dedicated folder on my desktop with a text file per project and sketch dimensions inline.
Pay special attention to holes and recesses. A hole that looks round may actually be slightly elliptical from wear or mold draft. Measure in two perpendicular axes. For hole spacing, measure both the distance between centers and the distance between edges—the latter is easier to verify later when your part prints.
Common beginner mistakes here include assuming a part is symmetrical when it’s not, ignoring the original part’s design intent (like a living hinge that needs specific thickness), and measuring a worn or deformed part as if it’s pristine. If the part broke from stress, the broken surface might not represent the original shape. Look for intact reference points on the surrounding assembly.
A practical tip: before removing the part, sketch a rough diagram showing it in place. Note which side faces up, which holes align with what, and any markings or numbers. This context disappears the moment the part is out.
Step 2: Designing the Replacement in CAD
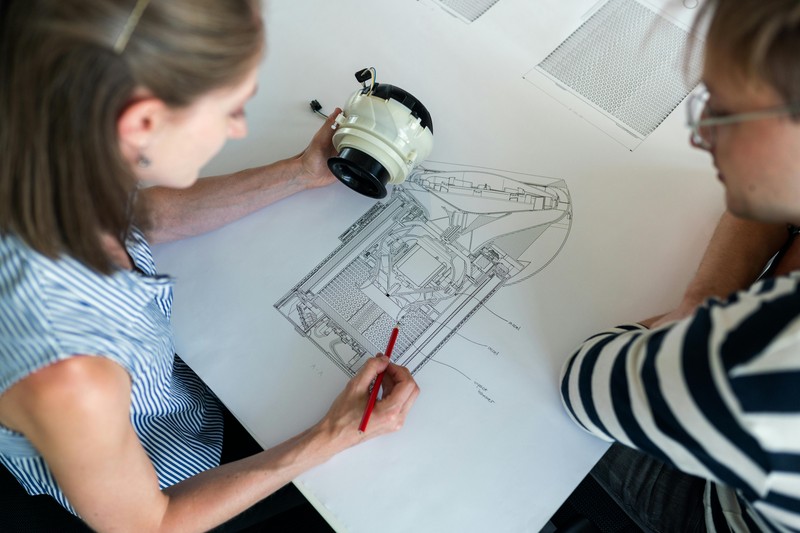
Once you have clean measurements, open your CAD software and start a new project. For simple replacement parts—flat brackets, clips, spacers—the process is straightforward.
Begin with a sketch on the top plane. Draw the outline of your part using the dimensions you recorded. For TinkerCAD, drag basic shapes onto the workplane and resize them. For Fusion 360 or Onshape, use the line and circle tools to create a closed profile. Either approach works; pick what feels faster.
Add holes using the same process. Place circles where your measured hole centers sit. In parametric CAD, use the dimension tool to lock those positions. In TinkerCAD, align holes manually and use the ruler tool for precision.
Extrude the sketch to your measured thickness. If the part is symmetric, consider extruding symmetrically from the midplane—it makes alignment easier when you print. Add fillets to any sharp external corners. This reduces stress concentrations in the printed part and avoids the brittle edges that crack during handling.
When designing parts that fit over or into other components, you need clearance. For a shaft that rotates inside a hole, I add 0.3 mm to the hole diameter. For a clip that snaps onto a rail, I leave 0.2 mm of gap per side. Print a test ring or small section of the interface before committing to the full part. I keep a library of tolerance test pieces that I reuse across projects.
One example from my own work: I designed a replacement gear for a blender coupling. The original had worn down over years, leaving a rounded profile. I sketched the gear tooth profile based on adjacent teeth that weren’t worn, extruded the shape, and added a 0.4 mm clearance around the shaft hole. It meshed and ran smoothly on the first try—saved me from buying a new blender for $3 worth of PETG.
Choosing the Right Filament for Functional Parts
Filament choice determines whether your part lasts a month or a decade. Here’s how the common options stack up for functional 3D printing projects.
PLA is easy to print and available everywhere. But it’s brittle, deforms under heat above 60°C, and creeps under constant load. Use PLA only for low-stress indoor parts that won’t see sun or weight. A replacement knob for a desk lamp? Fine. A bracket for a car’s interior? Don’t.
PETG is the workhorse filament for functional parts. It prints at similar temperatures to PLA but has better layer adhesion, higher impact resistance, and handles outdoor UV exposure reasonably well. It doesn’t need an enclosure and sticks well to a PEI sheet. I use PETG for drawer slides, tool holders, and outdoor light covers. For most readers, this is the best starting point. You can browse PETG filament to find spools suitable for durable projects.
ABS is stronger and more heat-resistant than PETG but requires an enclosure to prevent warping and cracking. The fumes are noticeable and ventilation is important. I use ABS only when the part sits near a heat source, like a vent cover or a component inside an electronics enclosure.
Nylon (PA6 or PA12) is extremely tough and durable. It absorbs moisture quickly, requires a dryer, and prints at high temperatures—typically 250–280°C. It’s overkill for most household repairs but perfect for parts that take impact or abrasion, like a replacement hinge for a heavy door or a gear in a power tool.
Here’s a quick guide for common situations:
- Indoor, no load: PLA
- Indoor, light load or outdoor occasional: PETG
- Near heat or outdoor constant: ABS
- High wear or constant force: Nylon
I keep a spool of eSun PETG and a spool of Hatchbox PLA on hand for the bulk of my projects. For anything more demanding, I order what I need.
Step 3: Printing Settings for Durability
Your slicer settings directly control part strength. You can have a perfect design and the most advanced filament, but if your settings are wrong, the part will fail.
Layer height: For functional parts, use 0.2 mm or 0.24 mm. Lower heights (0.1 mm) increase print time without meaningful strength gains. Higher heights (0.3 mm) may reduce layer adhesion. Stick with 0.2 mm for most applications.
Wall count: This is the most important strength parameter. I use a minimum of three walls for any functional part, and four for parts that bear load. Thin walls with one or two perimeters are structurally weak because the infill doesn’t bond evenly to the outer shell. More walls mean the part behaves more like a solid block under stress.
Infill density: Don’t follow the default 20% for decorative prints. For functional parts, run 30% minimum, and 50% for parts that take bending or impact forces. I use triangular or gyroid infill patterns—they offer good strength without excessive material use. Grid infill is fine too but tends to create weak points at intersections.
Temperature: Print the first layer 5–10°C hotter than subsequent layers to improve bed adhesion. For PETG, I start at 245°C nozzle, 80°C bed, then drop to 235°C for the rest. For PLA, 215°C nozzle, 60°C bed works reliably.
Print speed: Slow down for the first few layers. I set my outer wall speed to 40 mm/s and infill to 60 mm/s. This avoids layer separation on delicate geometry like thin walls or unsupported edges.. For more on this, see our guide on 3D Printed Lithophane Lamps: The Ultimate Personalized Gift.
A practical tip: print a small test ring that replicates the critical fit of your part—like a hole and shaft pairing. Check the fit before you run the full 6-hour print. Adjust your tolerances by tweaking the horizontal expansion setting in your slicer if needed. It’s much faster than reprinting the entire component.
Common Mistakes in Functional 3D Printing Projects
I’ve made every mistake on this list. Here’s what to watch for.
Ignoring shrink factor. PETG and ABS shrink as they cool, more than PLA. If you design a part to exact measurements, it will come out slightly smaller. For most parts, this doesn’t matter much—0.2–0.5% shrinkage. But for press-fit parts or tight assemblies, scale your model up by 0.5–1% in the slicer to compensate.
Poor measurement. I once printed a bracket for a shelf that looked correct but was 2 mm too short on one axis. I had misread the caliper. Measure three times and compare against photos.
Over-complicating the design. Beginners often add unnecessary features—bosses, ribs, chamfers that don’t serve a purpose. Keep the geometry as simple as possible. Fewer overhangs, fewer supports, fewer failure points.
Wrong material choice. I printed a small outdoor bracket in PLA. The first hot day warped it so badly the bracket pulled loose. PLA doesn’t belong outside. Save yourself the reprint—use PETG or ABS from the start.
Not adding support for overhangs. If your part has bridges or steep overhangs, enable supports in the slicer. The resulting surface may be rougher, but it will have proper strength. A print that fails mid-layer because you skipped supports is wasted time and filament.
When Should You Buy Instead of 3D Print a Replacement?
Printing isn’t always the best answer. I’ve learned to step back and evaluate before committing to a design.
High-stress or safety-critical parts belong in the trash, not on your printer. Brake components, suspension parts, structural load-bearers, fasteners that hold heavy items, anything that could cause injury if it fails—buy these. Injection-molded nylon or metal parts have predictable failure modes and certified strength. FDM layer adhesion is directional and weaker in one axis.
Food-safe parts are tricky. Most filaments are not food-safe, and the layer lines in FDM prints harbor bacteria. If you need a replacement spatula handle or a lid, buy one. If you need a custom measuring cup that won’t be used for hot liquids, PLA is considered food-safe by some standards, but treat it as one-time-use.
Very large parts that take up most of your build volume are usually better purchased. The time and material cost add up quickly, and larger prints are more prone to warping. A 20 cm replacement part? Print it. A 40 cm part? Check how much a generic replacement costs first.
Parts requiring certification or compliance—electrical enclosures rated for flame resistance, medical device components, automotive interior parts—should not be 3D printed unless you have the proper materials and testing. The risk isn’t worth it.
For everything else, printing is faster and cheaper than buying. Over time, you develop a sense for which projects to attempt and which to skip.
Practical Example: Replacing a Broken Drawer Clip
Here’s a real project from last year. The plastic clip that holds my kitchen drawer face to the rail snapped in half. The drawer rode crooked and wouldn’t close fully.
Measurement: The clip was about 40 mm long, 15 mm wide, and 6 mm thick. It had two mounting holes spaced 25 mm apart center-to-center. The clip’s hook engaged with a metal rail. I measured the hook’s depth and backset with my calipers, noting that the clip sat flush against the drawer edge.
Design: I opened TinkerCAD and stacked two rectangular boxes: one for the main body (40×15×6 mm) and one for the hook (5×8 mm extending from the top face). I used the hole tool to place two 4 mm diameter cylinders where the mounting holes went. I added a fillet to the hook’s leading edge to match the original’s smooth engagement. The entire design took about 10 minutes.
Printing: I used PETG from eSun, 0.2 mm layer height, three walls, 40% infill, no supports. The print took 45 minutes.
Fit: The clip slid into place perfectly. The hook engaged without binding. The drawer sat flush again. I tested it by opening and closing the drawer 50 times—no issues. That was six months ago and the clip still holds.
The alternative was buying a set of replacement clips online for $12 with a week-long wait, or a new drawer system for $30. My cost: about $0.15 in filament.
Post-Processing and Finishing Functional Parts
Most functional parts need no finishing. But sometimes a little work turns a good print into a long-lasting one.
Sanding is useful when your part has rough overhangs or support marks. 220-grit sandpaper followed by 400-grit smooths surfaces without removing much material. Be careful around fit surfaces—too much sanding and your part becomes loose.
If you need threaded holes, either add a clearance hole in CAD and use a tap (3D-printed holes tap nicely in PLA or PETG), or add heat-set threaded inserts for permanent threads. For inserts, print a hole 0.3 mm larger than the insert’s outer diameter, then press the insert in with a soldering iron set to 250°C. This gives metal threads that won’t strip.
For parts subject to wear, applying a thin layer of CA glue (superglue) to friction surfaces can extend life. I’ve done this on drawer slides and hinge pins with good results.
Recommended Gear to Level Up Your Functional Prints
If you’re printing functional parts regularly, a few upgrades make a real difference.
Hardened steel nozzles handle abrasive filaments like carbon fiber-filled Nylon or glow-in-the-dark PLA without wearing out. A set of three costs under $20 and saves you from constantly replacing brass nozzles. Frequent users may want to look into hardened steel nozzles for longer-lasting performance.
PEI powder-coated bed sheets give excellent adhesion for PETG without glue stick or hairspray. Prints pop off when the bed cools. They’re the single best upgrade for reliability in my experience.
Enclosure kits let you print ABS and Nylon without warping from drafts. Even a cardboard box enclosure can help. If you print these materials more than once a month, a proper enclosure (like the Creality tent) is worth it for consistency.
Filament dryers are essential for Nylon and PETG in humid environments. A $40 dryer keeps filament at 50°C for hours before printing. Wet filament causes stringing, weak parts, and poor layer adhesion.
These aren’t mandatory, but they remove common failure points and let you focus on designing rather than troubleshooting.
Final Thoughts: Start Small and Iterate
Functional 3D printing projects reward patience and iteration. Your first replacement part may not fit perfectly. That’s normal. Adjust the measurement, tweak the CAD, and print again. Each attempt teaches you something about tolerances, material behavior, and design constraints.
I keep a physical notebook of failed prints with notes on what went wrong. It sounds old-school, but referring back to those pages has saved me hours of repeated troubleshooting. The lessons stick better when you write them down.
Start with something simple—a broken clip, a missing cover, a stripped knob. Follow the steps here: measure carefully, design simply, choose the right filament, and dial in your slicer settings. Even a basic success shows you how capable a $200 printer can be when applied to real problems.
Ready to start your first functional print? The tools matter—a reliable set of calipers for 3D printing and quality PETG filament will give you a head start. Having the right supplies from the beginning makes the learning curve much smoother.. For more on this, see our guide on Food Safe 3D Printing: Best Materials and Coating Techniques.