3D Printing for Kids: Safe and Educational STEM Projects
Introduction
If you’re looking for something that gets kids into STEM beyond another screen or workbook, 3D Printing is worth a look. It blends design, engineering, and immediate, tangible results. The first time my kids watched a plastic dinosaur appear from a spool of filament, it changed how they thought about making things. This guide covers what you need to know about 3D printing for kids, from safety and printer selection to specific projects you can actually finish in a weekend.
Let’s set some realistic expectations first. 3D printing isn’t a toy you hand over and walk away from. It involves heat, moving parts, and some frustrating moments. But with the right setup and a patient approach, it becomes one of the more rewarding learning tools you can have at home. This article walks through the practical steps so you can avoid the mistakes I made and get to the good parts faster.. For more on this, see our guide on The Ultimate Guide to 3D Printed Musical Instruments: Best Filaments for Acoustics.

Why 3D Printing Is a Powerful STEM Tool for Kids
The reason 3D printing works well for kids is that it connects abstract ideas to physical objects. When a kid designs a simple gear and then holds it in their hand, they immediately understand how teeth mesh and torque transfers. That’s something a textbook can’t really replicate.
Beyond engineering principles, kids pick up skills like:
- Spatial reasoning: Rotating a 3D model in software teaches how shapes fit together from different angles.
- Iterative problem solving: The first print almost always fails. Learning to adjust supports or change wall thickness is a real-world lesson in debugging.
- Planning and patience: A 3-hour print teaches time management in a way a timer can’t.
- Slicing software basics: They learn that a digital model isn’t enough—you need to understand layer height, infill percentage, and print speed to get a good result.
It also fits into school lessons. A model of a cell or a set of gears can reinforce biology or physics concepts. The key is that it’s not passive. Kids are designing, failing, adjusting, and retrying. That’s real learning.
Safety First: What You Need to Know Before Starting
Let’s get the serious stuff out of the way. 3D Printers aren’t inherently dangerous, but they have real risks if you’re not paying attention. Based on what I’ve learned running printers with kids around, here’s a practical safety checklist.
Ventilation and Fumes
Different filaments produce different fumes. The biggest rule: avoid ABS filaments entirely. ABS releases styrene fumes that aren’t something you want kids breathing. Stick with PLA (polylactic acid) for 99% of prints. PLA is made from cornstarch and gives off a faint, sweet smell that most people find harmless. If you print with PETG, which is a bit more durable but still safe, keep the room ventilated. A small fan near a window helps.
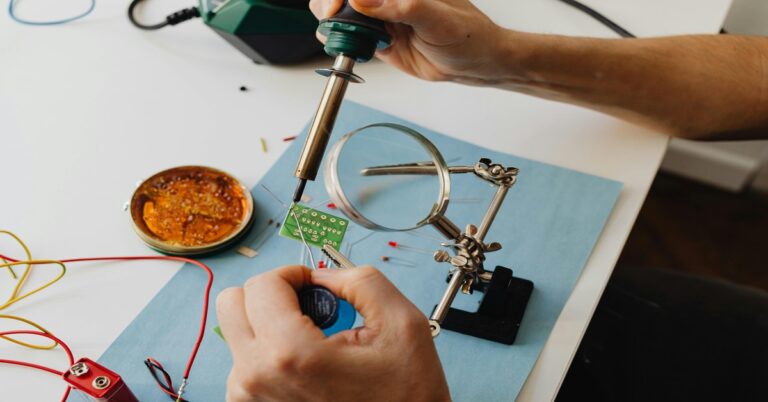
Burn Risks
The print head (hot end) reaches temperatures between 180°C and 260°C. The heated bed can get up to 60-110°C. That’s hot enough to burn skin. For younger kids (under 10), an enclosed printer like the Prusa Mini+ or Bambu Lab A1 mini with the optional enclosure is a good idea. If you’re using an open-frame printer like the Creality Ender 3 V3, set up a physical barrier or make a rule that kids don’t touch the printer while it’s running.
Moving Parts
The belts, pulleys, and stepper motors move quickly. Loose clothing, hair, or curious fingers can get caught. My rule is simple: no touching the printer while it’s printing. After it finishes and cools down, kids can help remove prints and clean the bed.
Small Parts and Choking Hazards
Printed objects can break into small pieces. Even the filament itself (1.75mm diameter) is a choking hazard for children under 5. Always supervise young children during the entire printing process.
Quick Do’s and Don’ts
- Do put the printer on a stable, heatproof surface.
- Do unplug the printer when not in use.
- Do teach kids to use a plastic scraper (not metal) for removing prints.
- Don’t leave a running printer unattended for long periods.
- Don’t let kids handle the hot nozzle or bed.
- Don’t use ABS, nylon, or polycarbonate filaments.
Choosing the Right 3D Printer for Your Child
You don’t need a top-tier professional printer to start. But you also don’t want a cheap, unreliable machine that will frustrate everyone. Here’s how to think about it.
Enclosed vs. Open Frame
For families with younger kids (under 10), an enclosed printer is the way to go. The enclosure keeps little hands away from hot parts and helps maintain stable temperatures for better prints. The Bambu Lab A1 mini has a great optional enclosure and is incredibly easy to use. It costs a bit more, but the print quality and reliability are solid. For older kids (10+), an open-frame printer like the Creality Ender 3 V3 or Prusa Mini works well. They’re cheaper and teach more about how the printer itself works.
Auto-Bed Leveling Matters
Bed leveling is the single biggest frustration for beginners. If the bed isn’t level, prints won’t stick, and you’ll spend 20 minutes adjusting knobs before every print. Get a printer with auto-bed leveling. The Bambu Lab A1 mini and Creality Ender 3 V3 both have this. The Prusa Mini has a similar system. It saves hours of hassle.
Build Volume
For kids’ projects, you don’t need a huge build plate. A print volume of about 180mm x 180mm x 180mm is plenty for small toys, gears, and nameplates. The Bambu Lab A1 mini (180 x 180 x 180 mm) is a good fit. The Prusa Mini (180 x 180 x 180 mm) is also fine. If you want to print larger items, consider a bigger bed like the Creality Ender 3 V3 (220 x 220 x 250 mm).
Noise Levels
Printers can be noisy. The stepper motors, fans, and moving parts create a constant hum. If the printer will be in a bedroom or living room, look for quieter models. The Bambu Lab A1 mini is noticeably quiet. The Prusa Mini is also relatively quiet. The Creality Ender 3 V3 is louder but still manageable.
For most families, I’d recommend the Bambu Lab A1 mini. It’s easy to set up, has auto-bed leveling, is quiet, and has excellent print quality. The Creality Ender 3 V3 is a solid budget option if you’re willing to spend more time on setup and calibration.
Kid-Friendly Filaments: Which Ones to Use and Avoid
Filament choice is almost as important as the printer itself. The right filament makes printing easy and safe. The wrong one creates frustration and health risks.
PLA (Polylactic Acid) – The Gold Standard
PLA is the default filament for kids’ 3D printing. It’s made from renewable resources like cornstarch, prints at relatively low temperatures (190-220°C), and gives off a faint, sweet smell. It’s rigid, easy to post-process (you can sand or paint it), and it’s biodegradable under industrial conditions. For beginners, start with PLA. You can get a multi-pack of 4-5 colors for a reasonable price. I’d recommend a quality PLA multi-pack so kids can experiment with colors without buying separate spools.
PETG (Polyethylene Terephthalate Glycol) – Step Up for Durability
PETG is tougher than PLA and slightly more flexible. It resists impacts and holds up better outdoors. If your kid wants to print a functional part like a hook or a bracket, PETG is a good choice. It prints at 220-250°C and requires a heated bed. It’s still safe to use in a well-ventilated room, but it can be more challenging due to stringing. Save this for after they’ve mastered PLA.
Filaments to Avoid
- ABS (Acrylonitrile Butadiene Styrene): Releases styrene fumes that are toxic. Don’t use with kids in the house.
- Nylon: Requires very high temperatures (250-270°C) and emits fumes. Not beginner-safe.
- Polycarbonate (PC): Similar to nylon, high temps and fumes.
- TPU (Thermoplastic Polyurethane): This is flexible filament. It’s safe to use, but it’s tricky for beginners. Save it for later.
Pre-Colored Filament Saves Painting Headaches
Kids love color, and painting 3D prints introduces chemicals and fumes. The safest approach is to buy pre-colored PLA filament. Multi-color packs let every print come out in bright colors without post-processing. That’s one less thing to worry about.
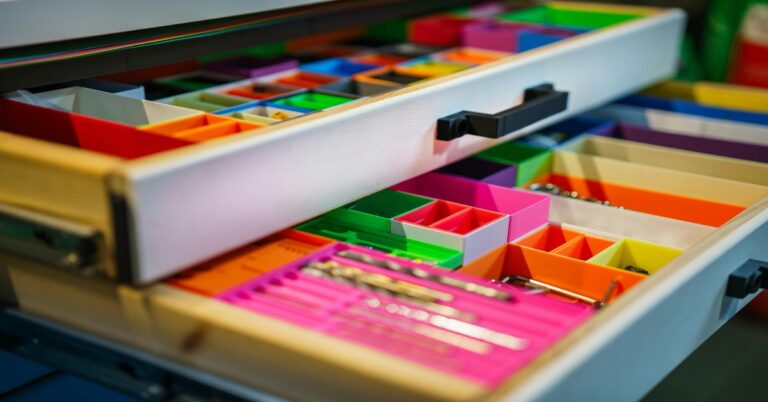
Essential Tools and Accessories for Kids’ 3D Printing
You’ll need a few extras beyond the printer and filament. These tools make the process smoother and safer.
- Glue stick (e.g., Elmer’s Purple): A thin layer on the print bed helps PLA stick better, especially for the first layer. It’s cheap and effective. Get a pack of glue sticks.
- Plastic scraper or putty knife: Use plastic to avoid scratching the build plate. Metal scrapers can damage the surface. Get a plastic putty knife set.
- Needle-nose pliers: For removing supports from prints. Teach kids to do this on a cooled print to avoid sharp edges. Get a small set of pliers.
- Filament dryer: If you live in a humid climate, wet filament causes stringing and poor adhesion. A cheap filament dryer is worth it. Get a simple filament dryer box.
- Isopropyl alcohol (70%+): For cleaning the print bed between prints. A spray bottle and a microfiber cloth work well.
Also consider a small tool kit with safety scissors for cutting filament and a pair of tweezers for removing stringing from the nozzle. Keep everything in a dedicated box so kids learn to respect the tools.

5 Beginner-Friendly 3D Printing Projects for Kids
Here are five projects that are safe, educational, and print relatively quickly. Each one teaches a specific STEM concept. I’ve listed where to download the model, filament needed, estimated print time, and the learning outcome.
1. Whistle
- Where to find it: Search “Whistle STL” on Printables or Thingiverse.
- Filament: PLA (one color)
- Print time: 45 minutes to 1 hour
- STEM concept: Sound waves. Blowing through the whistle shows how air pressure and chamber shape produce a pitch. Kids can experiment with different hole sizes or chambers to change the sound. Troubleshooting tip: if it doesn’t whistle, the internal channel might be too small or clogged with support material. Print with tree supports if needed.
2. Gear Bearing Case (Fidget Spinner)
- Where to find it: Search “Gear bearing STL” on Printables or MyMiniFactory.
- Filament: PLA (two colors for the gears and case)
- Print time: 1.5 to 2 hours per gear
- STEM concept: Gears and rotational motion. This project teaches how gear teeth mesh, how ratios work, and how bearings reduce friction. It’s a mechanical puzzle kids can assemble. Troubleshooting tip: gears may not spin freely if the clearance is too tight. Adjust the model in Tinkercad or sand the edges gently with fine-grit sandpaper.
3. Simple Catapult
- Where to find it: Search “Simple catapult STL” on Thingiverse.
- Filament: PLA (use 20-30% infill for the arm)
- Print time: 2 to 3 hours total (multiple parts)
- STEM concept: Levers and potential/kinetic energy. The catapult arm acts as a lever. Kids can change the fulcrum position or rubber band tension to see how it affects distance. Troubleshooting tip: if the arm breaks on launch, increase infill or switch to PETG for the arm piece.
4. Dinosaur Skeleton Puzzle
- Where to find it: Search “Dinosaur skeleton puzzle STL” on Printables.
- Filament: PLA (white or bone-colored)
- Print time: 3 to 4 hours total (multiple pieces)
- STEM concept: Anatomy and assembly. Kids learn to fit together interlocking pieces, teaching spatial awareness and skeleton structure. Troubleshooting tip: if pieces don’t fit, check tolerances. You may need to adjust the model scale by 1-2% in the slicer.
5. Nameplate with Removable Letters
- Where to find it: Design yourself in Tinkercad (see workflow below) or search “Removable letter nameplate STL” on Thingiverse.
- Filament: PLA (at least two colors: one for the base, one for letters)
- Print time: 1.5 to 2 hours total
- STEM concept: Design thinking and text manipulation. This project introduces 3D modeling basics: creating a base block, adding text, and adjusting depth for a press-fit. It builds confidence because it’s personal and useful. Troubleshooting tip: letters should be 0.5mm wider than the slot to create a snug friction fit.
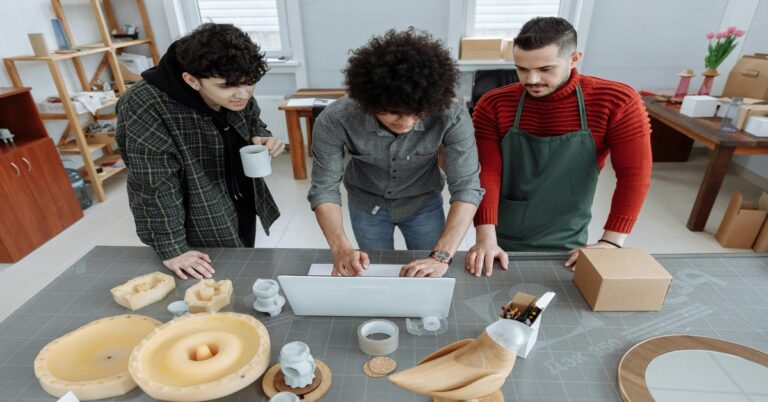
Setting Up a Design Thinking Workflow for Kids
Printing pre-made models is fun, but the real learning starts when kids design their own. Here’s a simple workflow that turns an idea into a Real Object.
Step 1: Sketch on Paper
Before touching software, have your child draw the object from at least two angles (front and top). This forces them to think about dimensions, proportions, and functionality. A simple sketch of a keychain, pencil holder, or toy builds the habit of planning before creating.. For more on this, see our guide on 15 Best 3D Printed Home Organization Projects: Practical Prints for a Tidy House.
Step 2: Model in Beginner CAD
For kids ages 7-12, Tinkercad is the best option. It’s web-based, free, and uses drag-and-drop geometric shapes. Kids can combine, cut, and rotate shapes to build their design. Most kids can create something in 30 minutes. For older kids (13+), Fusion 360 for personal use is free and more powerful. It has a steeper learning curve but teaches real engineering CAD skills.
Step 3: Export to STL
Once the model is done, export it as an .STL file. Tinkercad and Fusion 360 both have a simple export button. Make sure the model is manifold (no holes or reversed faces). Most software highlights errors.
Step 4: Slice with Software
Open the STL in a slicer like Bambu Studio (for Bambu printers), PrusaSlicer (for Prusa or Ender), or Cura (for most open-source printers). Explain to your child:
- Layer height: 0.2mm for speed, 0.1mm for detail.
- Infill: 10-20% for most toys. Higher infill for functional parts.
- Supports: Only use when you have overhangs greater than 45 degrees. Tree supports are easier to remove.
Step 5: Print, Test, Iterate
Start the print and watch the first layer. If it doesn’t stick, stop and adjust. After printing, test the function. Does the gear spin? Does the whistle blow? If not, go back to the CAD software and adjust dimensions. This cycle of Think, Draft, Model, Slice, Print, Test, Iterate is the core of the design process. It’s not a failure if the first print doesn’t work—it’s a learning opportunity.
Common Mistakes Parents Make (and How to Avoid Them)
I’ve made almost every mistake on this list. Here’s what to watch out for.
1. Rushing the First Print
You get the printer, unbox it, and want to see it work immediately. Take an hour to read the manual, level the bed, and load the filament properly. A rushed first print almost always fails and creates frustration. Set aside a weekend afternoon for the initial setup.
2. Skipping Bed Leveling
Even with auto-bed leveling, you need to check the first layer. If you skip this step, prints won’t stick, and you’ll waste filament. Make it a habit to manually verify the first few lines of extrusion.
3. Using Low-Quality STL Files
Not all STL files are created equal. Some are poorly modeled with thin walls or unrealistic tolerances. Before printing, check the comments and user reviews on Printables or Thingiverse. Look for models with “verified” tags or high ratings. If a model looks too good to be true, it might have print issues.
4. Ignoring Print Speed Recommendations
Every filament has a recommended speed range. Printing PLA at 60mm/s is fine. Printing it at 100mm/s will cause under-extrusion and poor quality. Start with the slicer’s default speed and only increase after you’ve printed a few successful objects.
5. Not Supervising Small Children with Small Parts
Printed objects, especially supports, can break into small pieces. If you have a child under 5, don’t leave them alone with finished prints. Check for sharp edges and sand them down with fine-grit sandpaper (400+).
When to Upgrade: Moving Beyond Simple Projects
Your child will eventually get bored with printing nameplates and toys. Here are signs they’re ready for more complexity:
- They can consistently print a successful model without help.
- They start modifying STL files in Tinkercad or Fusion 360.
- They ask about printing with multiple colors or flexible materials.
When this happens, consider:
- Multi-part assemblies: Print gears, hinges, or nesting structures. These teach about clearance and tolerance.
- Flexible filaments (TPU): Requires a printer with a direct-Drive Extruder. It’s more challenging but opens up projects like custom phone cases or rubber bands.
- Second nozzle or multi-material system: If you have a Bambu Lab A1 mini, you can buy the AMS lite to print in multiple colors. For other printers, manual filament swaps are possible, just more work.
- Glass bed upgrade: Improves first-layer adhesion and gives a smooth finish on the bottom of prints. A simple and cheap upgrade.
Don’t rush upgrades. Stick with PLA and simple models for at least 20-30 successful prints before adding complexity.
Where to Find Reliable, Kid-Safe 3D Models Online
Not all model repositories are the same. Here are the best ones for kids’ projects.
Printables (by Prusa)
Printables is my top recommendation. It has a large, community-verified library with a focus on printability. Models are tagged by difficulty (Beginner, Intermediate, Advanced), and users can upload photos of their prints. The “Beginner” filter is reliable. Best for: reliable, easy-to-print models.
Thingiverse (by MakerBot)
Thingiverse has the largest library of any repository. The downside is that quality control is minimal. Some models are poorly designed or have missing parts. Always check the comments and number of makes before printing. Best for: sheer quantity and niche projects.
MyMiniFactory
MyMiniFactory has a curation team that checks models before they’re published. The quality is generally higher than Thingiverse, but the library is smaller. Many models are free, though there’s a premium section. Best for: high-quality, guaranteed-printable models.
How to Judge If a Model Is Suitable
- Look for “Beginner” tags.
- Read user reviews and see if others had printing issues.
- Check the model’s “makes” (photos of finished prints). If there are many successful makes, it’s likely a good model.
- Avoid models with thin walls (<1mm) for kids’ projects—they break easily.
For a curated selection, check out STL file bundles designed for kids. These often come with print settings and troubleshooting tips built in.

Final Thoughts: Making 3D Printing a Habit, Not a Hobby
3D printing works best when it becomes a regular part of your family’s learning routine. The trick is to make it sustainable. Try setting a simple goal: one small print per weekend. This keeps skills fresh without overwhelming anyone.
Document the journey. Take before-and-after photos of failed prints. Write down what went wrong and what you changed. This turns a frustrating experience into a valuable learning log. Kids enjoy seeing how much they’ve improved over a few months.
Supervision is non-negotiable for young kids. But as your child gets older—and shows they can handle the tools responsibly—you can step back and let them take the lead. That’s when 3D printing becomes a genuine skill, not just a toy.
If you’re ready to get started, grab a safe starter bundle. A printer like the Bambu Lab A1 mini, a few spools of PLA, and the basic tool kit I mentioned above will get you through the first 20 projects. Check out this curated starter bundle on Amazon to get everything in one go.
Go make something cool.
My honest take: don’t chase features you won’t use. The $3000 printer won’t make you a better designer, and the pro software won’t help if you never open it. Match the tool to your actual projects, not your aspirations. That’s how you actually finish prints instead of just reading about them.. For more on this, see our guide on How to Paint 3D Printed Miniatures: A Beginner’s Guide to Fine Detail.