The Ultimate Guide to 3D Printed Musical Instruments: Best Filaments for Acoustics
“`html
From what I’ve seen comparing these side by side, the differences aren’t always where you’d expect.. For more on this, see our guide on 15 Best 3D Printed Home Organization Projects: Practical Prints for a Tidy House.
Why Filament Choice Matters for Sound Quality
When you’re printing 3D musical instruments, the filament you pick matters just as much as the design file. It’s not just about looks—the material directly shapes how your instrument sounds, how long it holds up, and whether it’s even playable.
After working through this myself, I found a few things that textbooks don’t tell you.
Here’s the basic physics: sound moves through a solid by making its molecules vibrate. A stiff, dense filament passes those vibrations along efficiently, giving you clear, bright tones with decent sustain. A softer, more flexible filament soaks up some of that vibration, deadening the sound. That’s damping. Think of a steel tuning fork versus a rubber one: the steel rings, the rubber thuds.
For something like a flute or an ocarina, you want that ring. The air column inside creates the note, but the wall material affects the timbre and how well the sound projects. A rigid, smooth-walled instrument will sound more consistent and carry better. For a string instrument body like a ukulele, the material’s stiffness and density influence how the top plate vibrates to amplify the strings.
Layer adhesion is another big factor. Weak bonding between layers leaves tiny gaps that act like dampers, sucking energy out of the vibration. That’s why a poorly-printed PLA instrument can sound dull while a well-tuned one sounds crisp. Design and print settings absolutely matter, but filament choice sets the ceiling. You can’t fix a material problem with settings alone. This guide breaks down the best filament options based on real-world use, so you can match the material to your project and avoid wasting time on prints that sound like cardboard.
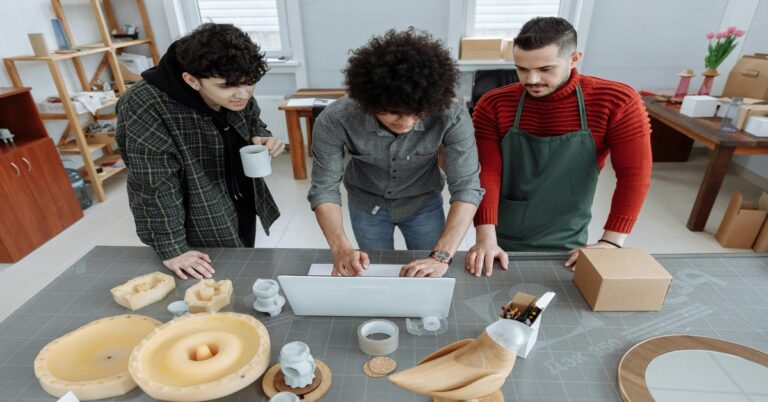
 PLA Filament on a print bed” title=”3D Printed Flute Made from PLA Filament” />
PLA: The Standard for Beginners and Clear Tones
PLA is the default for good reason. It’s easy to print, warps very little, and comes in a huge range of colors and finishes. For 3D printed musical instruments, it’s also a solid acoustic performer for certain jobs.
Its high stiffness and low damping make it ideal for wind instruments. A simple recorder or ocarina printed in standard PLA gives notes that are clear, bright, and surprisingly consistent. The material transmits the air column’s vibration efficiently, giving a clean fundamental tone without too many unwanted overtones. It’s a practical choice for student instruments where cost and ease of printing are priorities.
The main tradeoff is durability. PLA is brittle. A thin-walled flute dropped on a tile floor is likely to crack. Over time, UV light and moisture can make things worse. For a decorative kalimba or a prototype, PLA works great. For an instrument that gets handled regularly, you might want something tougher.
Tip: Annealing a finished PLA print can improve its resonance a bit. This means heating the part in an oven (around 60-70°C) for a controlled time. It increases crystallinity, making the material stiffer. It also shrinks the part, so you need to account for that in your design. It’s not trivial, but it can push PLA’s acoustic performance a step further.
For a reliable starting point, Hatchbox PLA is a consistent, well-reviewed option. eSUN PLA+ offers slightly better toughness while keeping excellent printability. Both are good choices for your first few instrument builds. If you need a versatile, affordable material for prototyping or teaching projects, a well-tested PLA filament from quality PLA filament is a solid start.
PETG: The Balanced Choice for Durable Instruments
PETG is what you grab when you need more than PLA offers. It’s significantly more impact resistant and less brittle, which makes it better for instruments that get transported or used by kids. Its acoustic profile is different from PLA, and that’s worth understanding.
PETG is slightly more flexible and has more internal damping than PLA. That means it produces a sound that is a little less brilliant, a little more mellow. For a string instrument body—like a ukulele or a guitar—this can be a real advantage. The slight damping can tame harsh overtones, resulting in a warmer, more balanced tone. It doesn’t have the same ‘ring’ as PLA, but for some instruments, that’s exactly what you’re after.
Printing PETG takes a bit more finesse. You’ll need higher nozzle temperatures (230-250°C) and a heated bed. Bed adhesion can be tricky—glue stick or hairspray on a glass bed is often necessary to prevent warping. It also likes to string, so you’ll need to tune your retraction settings. That said, the learning curve is shorter than with ABS, and the results are more forgiving.
Use cases: Ukulele bodies, guitar picks, percussion shakers, tambourine frames, and any component that sees regular handling. It’s also a good choice for larger instruments where PLA might be too fragile.
For a proven PETG, Overture PETG is a consistent, affordable choice. Polymaker PolyLite PETG is another good option with decent color consistency and less stringing. For those tackling larger or more durable builds, checking out durable PETG filament is a practical next step.
PETG vs. PLA: Head-to-Head Sound Comparison
Here’s how these two workhorses stack up on the specific metrics that matter for 3D printed musical instruments.
- Stiffness: PLA wins. It’s about 50% stiffer than PETG. This gives a brighter, more articulate sound with faster attack and clearer highs.
- Damping: PETG wins for warmth. Its higher internal damping cuts down on unwanted ringing and harsh overtones, creating a more mellow, rounded tone.
- Print Ease: PLA wins hands down. It prints at lower temperatures, doesn’t need a heated bed (though it helps), and is far less prone to warping or stringing.
- Durability: PETG wins. It’s much more impact resistant and less brittle. A PETG ukulele can survive a drop; a PLA one might not.
- Best Instrument Types: PLA is ideal for wind instruments (flutes, ocarinas, recorders) where clarity and projection matter most. PETG suits stringed instrument bodies, percussion frames, and any part that gets handled.
Practical takeaway: If your priority is the purest, clearest tone possible and you can handle some fragility, go with PLA. If you need a balance of decent sound and real-world durability, pick PETG.

TPU: When You Need Flexibility and Grip
TPU is a flexible filament, and that puts it in a niche spot for musical instruments. Its acoustic properties are fundamentally different. High damping kills resonance. You wouldn’t want to print the sound-producing part of a flute or a guitar body from TPU. It would sound like a wet sock.
Where TPU shines is in applications where flexibility or grip is the main requirement. Think of it as the rubber component in your instrument’s build.
Applications: Custom earbud housings that need a tight seal. Drum pad faces for electronic percussion that need a soft strike surface. Instrument grips for ergonomics on controllers or experimental instruments. Mouthpieces for certain wind instruments where a softer lip contact is preferred. Drumstick tips for creating a softer, more delicate sound on cymbals or practice pads.
Printing TPU is more challenging than PLA or PETG. It’s soft and flexible, which causes issues in a Bowden extruder. A Direct Drive Extruder is highly recommended. You also need to print slowly (20-30mm/s) and watch for stringing. It’s not a beginner material, but for these specific applications, it’s often the only option.
For a flexible TPU solution, NinjaFlex is the industry standard for quality and consistency. SainSmart TPU is a more budget-friendly alternative that works well for many applications. If you’re new to flexible components for your builds, you might want to look at flexible TPU filament.
ABS and ASA: The Forgotten Choices for Warmth
ABS and its UV-resistant cousin ASA often get skipped by makers who find them frustrating. The fumes, the warping, the need for an enclosure—it’s a lot of hassle. But for specific acoustic goals, they offer something unique.. For more on this, see our guide on 3D Printing for Kids: Safe and Educational STEM Projects.
ABS has a noticeably warmer, more ‘woody’ tonal quality compared to PLA. It has a certain depth to its sound that some makers describe as more organic. For a miniature guitar body or a kalimba soundboard, ABS can produce a tone that sounds less ‘plastic’ and more like a traditional instrument. This is because its damping characteristics are closer to wood than PLA’s.
The caveats are significant. You absolutely need a heated bed and an enclosure to control the ambient temperature and prevent warping. The fumes are noxious—ventilation is mandatory. The learning curve is steep. Expect some failed prints while you dial in your settings.
ASA offers similar acoustic properties to ABS but with superior UV resistance, making it suitable for outdoor instruments. If you’re building a prototype for a garden instrument or something that will sit in a window, ASA is a better bet.
Only attempt ABS or ASA if you have some experience with more advanced 3D printing and are willing to deal with the extra setup. For those who do, Polymaker PolyLite ASA is an excellent choice that prints more reliably than many ABS options. Hatchbox ABS is a solid ABS entry point for those with an enclosed printer.
Common Mistakes When Printing Instruments
I’ve seen a lot of builds go sideways. Here are the most frequent mistakes to watch out for.
- Using too much infill. Dense infill acts like a sound damper inside a hollow body. For wind instruments or resonant chambers, aim for 0-10% infill, or better yet, a single perimeter wall with no infill. The walls themselves are what vibrate.
- Ignoring layer orientation. Layer lines are weak points. If they run parallel to the vibration path (e.g., vertically on a flute body), they can create weak spots that kill resonance. Design your part so that layer lines run perpendicular to the primary vibration direction where possible.
- Printing too fast. High print speeds reduce layer adhesion. For instrument parts, slow down. A speed of 40-50mm/s is usually safer for good bonding. Sacrifice speed for quality.
- Skipping post-processing. A rough surface creates friction and turbulence in an air column, muddying the sound. A rough surface on a string instrument body can dampen vibrations. Don’t underestimate how much a smooth surface helps.
- Over-tightening assembly screws. 3D printed plastic is not as strong as wood. Over-torquing a screw can crack the part immediately or create a stress point that fails later. Use a gentle hand.
These are practical, avoidable errors. Pay attention to them and you’ll save both time and material.
Post-Processing Techniques to Improve Acoustics
Once the print is done, your job isn’t over. Post-processing can noticeably improve the sound quality by creating a smoother, more consistent surface.
Sanding is the first step. Start with 200-grit sandpaper to remove obvious layer lines and blobs. Progress to 400, then 800, and finally up to 1000 or 1500 for a smooth finish. Wet sanding with water helps reduce dust and prevents clogging the paper. For wind instruments, pay special attention to the airway, mouthpiece, and bore. A rough airway creates turbulence that affects tonal quality.
Vapor smoothing works well for ABS and ASA. Acetone vapor melts the outer layers of the plastic, creating a smooth, glossy surface. This can reduce air leaks in wind instruments. It takes practice to get consistent results without deforming the part, so test on scrap first.
Sealing with a thin layer of epoxy or super glue can also help. This fills micro-pores and creates a harder, more polished surface. For an ocarina, this can make a noticeable difference in note clarity. Use a brush-on epoxy to avoid thick layers that change dimensions.
For a sanding kit, a set of fine-grit sandpapers from 3M is a safe bet. For sealing, XTC-3D is a popular epoxy coating specifically formulated for 3D prints. A practical 3D print sanding kit can simplify the process if you’re new to finishing prints.
Best Filaments for Specific Instrument Types
Here’s a quick-reference guide to get you started.
- Wind Instruments (Flute, Ocarina, Recorder, Panpipes): PLA. Its stiffness and low damping give the clearest, brightest tones. PETG can work but will sound a bit more mellow. Avoid TPU and ABS for the sound-producing parts.
- String Instrument Bodies (Ukulele, Mini Guitar, Kalimba Soundboard): PETG or ABS. PETG offers a balanced tone with good durability. ABS gives a warmer, more ‘woody’ sound if you can handle the print difficulty.
- Percussion Instruments (Drums, Shakers, Tambourine Frames): PETG for strength and impact resistance. TPU for mallet heads or drum pad surfaces. PLA is too brittle for most percussion.
- Experimental Designs (Custom Synthesizers, Noise-Makers): PLA for prototyping. It’s cheap and fast to iterate. Once you’re happy with the design, consider PETG for a more durable final version.
- Accessories (Grips, Mouthpieces, Cases): TPU for flexible parts. PETG for rigid, durable cases.
Use this as a starting point. Your specific design, print settings, and post-processing will all contribute to the final sound. Test with small printable sections before committing to a full print.
Essential Gear for Printing Musical Instruments
Getting good results with specialty materials often requires a few key upgrades. These aren’t strictly necessary, but they make a significant difference.
- Dual-Gear Extruder: A geared extruder (like a Bondtech or its clones) provides more consistent force on the filament. This is crucial for TPU and for maintaining precise flow during PETG prints. It reduces the risk of under-extrusion at the higher speeds needed for some prints.
- Glass Build Plate: A glass bed offers a perfectly flat surface, which is essential for adhesion with PETG and ABS. It also lets you use glue stick or hairspray for better hold. It’s a cheap upgrade that solves many bed adhesion problems.
- Filament Dryer: PETG and ABS are hygroscopic—they absorb moisture from the air. Wet filament causes bubbles and popping during printing, which creates weak spots and rough surfaces that kill sound quality. A filament dryer (like the eSun eBox) keeps your material dry and your prints clean.
- Digital Calipers: Accurate measurement is vital for achieving tight tolerances in instrument parts, especially joints and air channels. A cheap digital caliper (like Mitutoyo or a reliable clone) is an essential tool for verifying your designs.
These tools address the most common failure points in instrument printing. They save you material and time by getting you closer to a usable print on the first try.

Final Recommendations: How to Choose Your Filament
Here’s a decision framework to simplify your choice.
If you’re a beginner making a wind instrument, start with PLA. It’s the easiest to print and gives you the best chance of a clear, playable result. Accept the brittleness for now. You can explore other materials later.
If you want durability for a portable instrument that will be handled, go with PETG. It’s the best balance of sound quality and toughness. It’s your best bet for a final, everyday-use instrument.
If you’re building a case, grip, or flexible component, TPU is your pick. Don’t use it for sound-producing parts. Use it where flexibility is the main requirement.
If you’re an experienced maker looking for a warmer, more wood-like tone, experiment with ABS or ASA. Be prepared for the extra work. The result can be unique, but it’s not for everyone.
I’ve been through this process enough times to know that the best choice is the one you’ll actually use.
The core tradeoff is between clarity (PLA) and durability (PETG). Know your project’s primary need and choose accordingly. Compare the specific filaments mentioned above based on your use case. The right choice will save you a lot of failed prints and deliver an instrument that sounds as good as it looks.
“`
That wraps up this guide. The key is to pick something that fits your actual workflow — not the one you hope to have. Start with the free options, test what works, and upgrade when you hit a wall. You’ll save money and frustration that way.. For more on this, see our guide on How to Paint 3D Printed Miniatures: A Beginner’s Guide to Fine Detail.