15 Best 3D Printed Home Organization Projects: Practical Prints for a Tidy House
Why 3D Printing Works for Home Organization
If you’ve got a drawer full of tangled cables or a spice rack where nothing fits, you’ve probably looked at store-bought organizers only to find they don’t quite match your space. That’s where 3D printed organization projects come in. Instead of settling for generic plastic bins, you can print exactly the size, shape, and color you need – often for less money.
3D printing gives you control over every detail. Need a drawer divider that’s 237mm wide instead of 250mm? No problem. Want a cable clip that matches your desk’s dark gray finish? A few hours on your printer and you’re done. The quality is good enough now that you can’t tell the difference from injection-molded parts, and you get way more flexibility.. For more on this, see our guide on 3D Printing for Kids: Safe and Educational STEM Projects.

In this guide, I’ll walk you through the Best 3D printed organization projects for every room in your house. You’ll get a curated list of functional designs, printing tips that save time and filament, and honest comparisons of where to find reliable STL files. Whether you’re a beginner with a basic Ender 3 or someone running a Prusa farm, these projects will actually solve your clutter problems.
What to Look for in a 3D Printed Organization Project
Not all 3D printed organizers are worth your time. Before you hit “download,” consider these criteria to avoid wasting a weekend on a model that doesn’t work.
Printability. The best projects use common filaments like PLA or PETG with no exotic materials or multimaterial requirements. Avoid models that need supports for every overhang unless you enjoy post-processing.
Functional design. Fancy aesthetics are fine, but prioritize function first. A spice rack insert that hides dust behind a solid door looks nice but might be impossible to clean. Open-frame designs often win for everyday use.
Ease of assembly. Snap-fit pieces are ideal because they don’t require hardware or glue. Screw-based designs are more durable but add complexity. For most home applications, snap-fit is enough.
Scalability. Good designers offer parametric or remixable files. You want something that can be resized without breaking geometry. If the STL comes as a single solid piece, check if the creator includes a STEP file or F3D source for editing.
One mistake beginners make is skipping the measuring step. A digital caliper – not a tape measure – is worth having on hand to record your drawer depths, widths, and offsets before downloading anything. A 0.5mm difference in fit can mean the difference between a finished project and another failed print.
Best Filaments for Functional Home Organizers
The filament you choose directly determines how long your organizer lasts. Here’s the short version:
PLA – Perfect for dry areas like desks, shelves, and closets. It’s easy to print, cheap, and available in every color. Downside: it softens above 50°C, so don’t leave PLA organizers in a hot car or near a stovetop. For most indoor organization, PLA is totally fine.
PETG – My go-to for kitchens and bathrooms. PETG handles moisture, heat, and occasional cleaning sprays better than PLA. It prints almost as easily as PLA with a slightly hotter nozzle (230-250°C). If you’re making drawer dividers for the kitchen, use PETG.
TPU – Great for cable clips, gaskets, and anything that needs grip. TPU is flexible and forgiving, but it’s slower to print and needs a Direct Drive Extruder. Not essential for most organizers but nice for specific use cases.
ASA/ABS – Overkill for most indoor use. Only consider these for garage tools or outdoor cabinets where UV and heat are concerns. ABS needs an enclosure and emits fumes, so skip it unless necessary.
If you’re stocking up on filament, Overture PETG rolls are reliable and consistently priced. For PLA, Hatchbox offers excellent layer adhesion without breaking the bank. Both work on nearly any consumer printer.
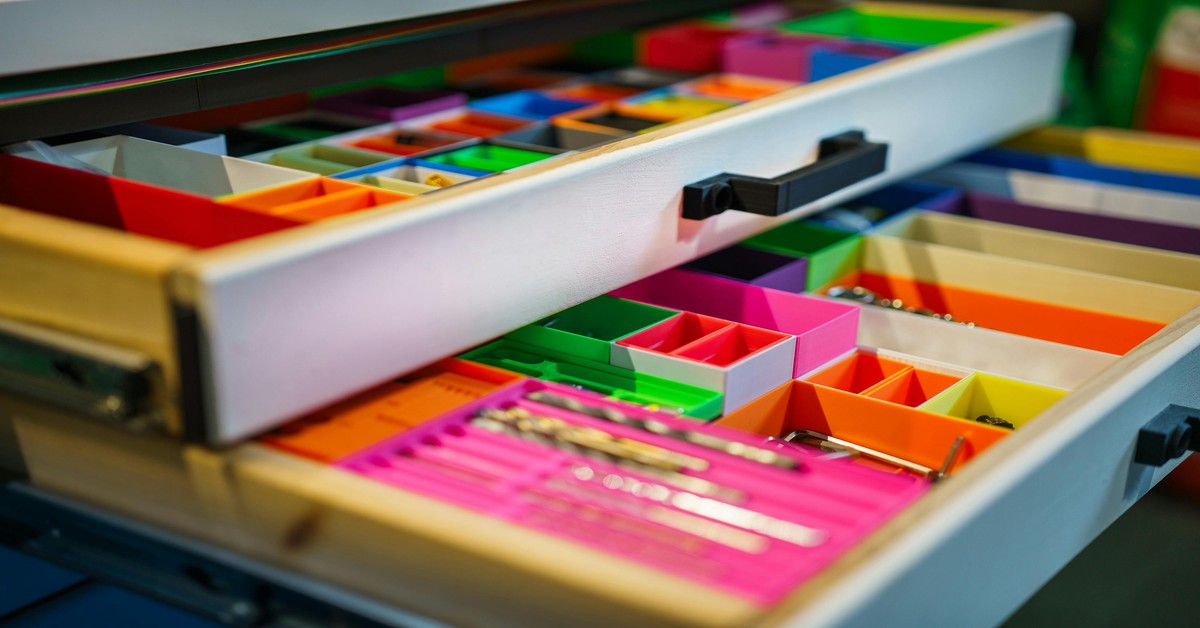
Kitchen Drawer Dividers and Cutlery Trays
Your kitchen junk drawer is probably the biggest offender in your entire house. 3D printed dividers solve this problem with customizable width, depth, and compartment count.
Look for parametric dividers on Printables or Cults3D. The best ones use a grid-based system where you define the cell sizes before printing. Some are designed as single-piece trays, others as interlocking modules. Single-piece trays look cleaner but waste space if you ever reorganize. Modular systems let you reconfigure later – worth the extra print time.
Tradeoff to consider: Open grid dividers collect crumbs between compartments. Solid-walled dividers are easier to wipe clean but use more filament. For cutlery, I prefer solid walls with rounded corners so bits don’t get stuck.
Before printing, measure your drawer’s internal clearance. Account for any handle hardware or drawer slides that protrude. A common mistake is designing a tray that’s 2mm too tall – it won’t slide in.
Measurement errors are easily avoided with a digital caliper like the Neiko 01407A (around $15 on Amazon) – it will save you from remeasuring. Accuracy to 0.01mm is overkill for organizers, but you need at least 0.1mm precision for decent fitment.
Customizable Cable Management Clips
Under your desk, behind your entertainment center – cables are chaos. 3D printed cable clips are cheap, fast, and highly effective at turning a nest into organized runs.
Two main types dominate: stick-on clips with adhesive backing and screw-in J-channels. Adhesive clips work fine for light cables (phone chargers, mouse wires) but fail under the weight of thick HDMI or power cables. Screw-in versions are more work to install but hold better long-term.
Printing tips: Most cable clips take less than 30 minutes per piece. Use PLA for speed or PETG if the clips will sit in a warm room. Print with a brim to prevent warping on small parts. No supports needed if you orient the clip so the adhesive surface lies flat on the bed.
For cable runs along walls, consider a J-channel model that routes cables behind a slim cover. These print in two parts – channel and snap-on lid – and can be cut to length. Much cleaner than zip ties.
If you manage a lot of thick cables, cable sleeves are worth considering for bundling runs together cleanly.

Bathroom Organizers: Drawer Inserts and Shelf Risers
Bathrooms are the hardest environment for 3D printed organizers. Humidity accelerates the failure of PLA, and small accessories get lost in cluttered drawers. Still, with the right material, prints hold up for years.
Best material: PETG. It resists moisture and is easy to wipe down. Avoid PLA in bathrooms – it will warp or become brittle over time.
Popular designs include makeup brush holders, razor blade disposal boxes, and adjustable shelf risers. Drawer inserts work well if you design them with drainage gaps (small slots at the bottom) so water doesn’t pool under soap dishes or toothbrush holders.
One design I keep coming back to is a modular makeup brush organizer. It consists of a base plate and cylindrical inserts that hold brushes by diameter. You print the base once, then print as many inserts as you need. Simple and tunable.
Tip: Line the bottom of your drawer with a silicone mat before placing the organizer. This prevents sliding and catches drips. A silicone drawer liner cut to size works perfectly, and a roll typically costs under $12.
Desk and Office Accessories for Clutter Control
Your desk collects pens, business cards, sticky notes, and random cables faster than any other spot. 3D printed organizers excel here because desk shapes are highly varied.
Pen holders are a great beginner project. The best designs use a hexagonal grid that you can stack or space apart. You control the height, grid spacing, and whether to add a sloping front facing. For heavy desk use, stick with PLA – it’s rigid and cheap.
Business card stands are another quick win. Most print in under an hour with no supports. Look for adjustable-width models that can hold different card stacks.
Monitor stands are more ambitious but extremely rewarding. A well-designed monitor stand lifts your screen to eye level and creates storage underneath. Weight capacity is critical – use 4-6 walls, 30-40% infill, and PETG for heat resistance. Under-designed stands sag after a few months.
Filament usage comparison: A minimalist pen holder uses about 30g of filament. A monitor stand uses 300-500g. Balance your filament budget accordingly.. For more on this, see our guide on The Ultimate Guide to 3D Printed Musical Instruments: Best Filaments for Acoustics.
Garage and Workshop Storage Solutions
Garage organizers need to survive temperature swings, dust, and heavy loads. This is where you’ll want thicker walls and stronger materials.
Pegboard hooks are one of the most practical 3D printed projects for the workshop. Generic metal hooks are cheap but often don’t fit your specific tool shapes. Print custom hooks for wrenches, screwdrivers, and pliers. Use PETG or ABS with 4-5 walls and 40% infill. Test one hook before printing a full set – if it snaps, increase wall count.
Bin labels are another high-value project. Print small tag holders that slide onto the front of storage bins. Use contrasting filament for readability (white on gray works well). For outdoor bins, use ASA to avoid UV yellowing.
Common mistake: Not accounting for the weight of stored items. A hook holding a 2kg hammer needs more reinforcement than one holding a screwdriver. Undersized hooks fail fast. Add a fillet at the base of the hook to distribute stress.
If you’re working on heavier garage projects, a digital scale helps verify the weight of your organizers before committing to full production.
Pantry Label Holders and Spice Rack Inserts
Pantry organization is all about labels and accessibility. 3D printed label holders keep you from guessing what’s in the container.
Label holder styles: Some are clip-on tags that slide onto jar lids. Others are magnet-backed strips that stick to a metal spice rack. Both work well. Clip-on tags print faster but require matching the jar’s diameter. Magnetic strips need a metal surface but are universal.
Spice rack inserts are usually designed as tiered shelves that lift cans at the back. Open-frame designs let you see labels at a glance but collect dust. Enclosed designs protect from spills but add bulk. For most people, open-frame wins for practicality.
Filament choice: PETG is ideal for the pantry. Food-safe filaments are rarely necessary here unless the organizer touches food directly. If you’re printing labels, use a high-contrast filament – white on dark gray provides excellent legibility.
Tip: Measure the height of your tallest spice jar before designing the shelf. A common gotcha is making the top shelf too low, which limits your jars.
For a polished look, reusable dry-erase labels stick to your printed label holders and let you rewrite contents anytime. A pack of 30 runs about $8.
Comparison of Free vs Paid STL Sources
Where you find your STL files matters a lot for quality. Here’s the breakdown:
Thingiverse – Free, vast catalog, but inconsistent quality. Many models are from early adopters with minimal testing. Filter by “downloads” or “likes” to find reliable designs. Good for inspiration, less ideal for functional parts.
Printables – Free, curated collection from Prusa. Quality is generally higher than Thingiverse. Community features like rating and comments help you spot issues. My go-to source for most home organizers.
Cults3D – Mix of free and paid designs. Paid designs ($2-$10) are usually tested, ready to print, and come with multiple file formats. Worth it for complex or multi-part organizers. Downloader fees support creators directly.
Yeggi – Search engine that indexes multiple sites. Good for finding obscure designs, but quality varies wildly. Check the original source before printing.
Quick-start guide: Bookmark Printables first. Search for your organizer type (e.g., “spice rack insert”). Filter by “highest rated” and “printable in under 6 hours.” Download the STL, open it in your slicer, and scale to your measurements. That’s it.
If you’re just getting started, a 3D Printer maintenance toolkit with cleaning needles, glue sticks, and replacement nozzles can save you from common issues during longer projects.

Common Mistakes to Avoid When Printing Organizers
Here are the real-world pitfalls that cost you time and filament:
1. Not measuring first. As mentioned, a digital caliper is non-negotiable. A 1mm error in width can make a drawer divider useless.
2. Using the wrong filament. PLA in a bathroom or near a heater is asking for trouble. PETG or TPU for moist areas. ABS for garages.
3. Skipping supports. Some models need support material for bridges or overhangs. Not adding supports can save time but often results in sagging, unprintable geometry. Check your slicer’s preview layer by layer.
4. Ignoring infill density. 15% infill works for decorative parts. For functional organizers carrying weight (like a spice rack), bump to 25-30%. Higher infill adds strength without dramatically increasing print time.
5. Not testing fit before a full batch. Print one divider first. Check if it slides into your drawer. If it’s tight, adjust scaling by 0.5% and reprint the test before committing to 10 identical pieces. This saves dozens of hours.
Quick Start: How to Scale Any Design to Your Space
Most STL files come in default sizes. Here’s how to resize them in your slicer (this works for PrusaSlicer and Cura):
- Load the STL into your slicer.
- Select the model and click “Scale.”
- Check “Uniform scaling” (keeps proportions) or uncheck it for axis-specific adjustments.
- Enter your desired measurement in millimeters for X (width) and Y (depth). Z height auto-adjusts unless you override it.
- Watch out: scaling up by more than 30% in any axis thins out the walls. If you need a significantly larger organizer, find a parametric model instead of brute-forcing the scale.
- Preview the sliced result. Check for gaps or thin walls in the layer view.
- Print a small test piece (like a corner only) to verify fit before committing to the full print.
If you’re scaling down, make sure the model doesn’t become too small to handle small details. A screw hole scaled below 3mm may not print cleanly.
For accurate measurements, a dial caliper or a digital measuring tool with a backlit display is handy for kitchen and bathroom use.
Our Top 5 Must-Print Organization Projects (Quick Picks)
Here’s the fast list – five projects you can start today:
- Parametric drawer divider – Adjustable grid system for your junk drawer. Print in PETG. From Printables.
- Cable turtle clip – Stick-on clip that routes three cables under your desk. Print in TPU for grip. No supports needed.
- Magnetic spice rack insert – Two-tier shelf that holds cans on a metal surface. Print in PETG. From Cults3D (free).
- Modular pen holder – Hexagonal base with removable inserts. Print in PLA. Resize to fit your drawer.
- Pegboard wrench hook – Custom hook for your specific tool set. Print in PETG with 40% infill.
Pick one, measure your space, and start printing. You’ll see the difference in an afternoon.
Start Printing Your Way to a More Organized Home
Store-bought organizers are designed for average spaces. Your drawers, desks, and cabinets aren’t average. 3D printed organization projects let you solve real fitment problems with precision and creativity.
Before you start another print, measure first. Choose the right filament for the room. Download from a trusted source. Print a test piece. These small habits save you from wasted filament and frustration.
Pick any project from the list above, gather your materials, and give it a shot. You’ll end up with organizers that actually fit your home – and probably a few more ideas for tomorrow.
At the end of the day, the right choice is the one you’ll actually use. I’d rather see someone produce a hundred simple prints with basic software than quit in frustration because they jumped into something too complex. Start simple, build skills, and expand from there.. For more on this, see our guide on How to Paint 3D Printed Miniatures: A Beginner’s Guide to Fine Detail.
supports. Some models need support material for bridges or overhangs. Not adding supports
printing. You’ll see the difference in an afternoon. Start Printing