How to Paint 3D Printed Miniatures: A Beginner’s Guide to Fine Detail
Introduction — How To Paint 3D Printed Miniatures
So you’ve got a freshly printed 3D resin miniature in your hands. Maybe it’s a space marine, a fantasy wizard, or a creature from a tabletop RPG. The detail is sharp, the lines are crisp, and now you’re staring at it wondering what to do next. Painting 3D printed miniatures is one of the more satisfying skills you can pick up as a maker or gamer. It turns a plain, gray resin model into something that stands out on the table or in a display case.
If you’re new to this, it can feel overwhelming. There are plenty of paints, brushes, and techniques out there. But you don’t need to be a professional artist to get good results. With the right approach and a bit of patience, you can paint miniatures that look clean and detailed.. For more on this, see our guide on 15 Best 3D Printed Home Organization Projects: Practical Prints for a Tidy House.
This guide is built for beginners. It walks through every step, from cleaning the raw print to applying the final protective coat. No fluff, no gatekeeping. Just practical advice that works.

Why Painting 3D Printed Resin Is Different from Plastic Kits
If you’ve painted plastic miniatures before, you might expect resin to behave the same way. It doesn’t. Resin has a different surface texture, and that changes how paint behaves on it.
First, resin is smoother than injection-molded plastic. That sounds good — and it is — but it also means paint doesn’t grip as aggressively. You can’t just slap paint on and hope it sticks. Without proper preparation, paint will chip or peel off easily, especially on edges and raised details.
Second, resin prints often have a thin layer of uncured resin left on the surface after printing. This sticky residue can trap dust and interfere with paint adhesion. That’s why you can’t skip cleaning. It’s not a suggestion; it’s a requirement.
Third, 3D printed resin miniatures frequently have support marks, layer lines, or tiny imperfections that plastic kits don’t. These need to be filed, sanded, or scraped smooth. If you leave them visible, they’ll stand out even more after painting.
The good news? Once you handle these quirks, resin actually takes paint beautifully. The surface allows for fine detail work, and brush strokes lay down smoother compared to some plastic kits. It just takes a little extra prep at the start.
Tools and Materials You’ll Need to Start
Let’s talk gear. You don’t need to spend a fortune upfront, but having the right tools makes a massive difference in both enjoyment and results. Here’s a practical starter list.
Brushes — Don’t buy the cheapest pack of nylon brushes from a craft store. They lose their tips quickly and leave bristles stuck to your paint jobs. Instead, get a small set of synthetic or kolinsky sable brushes in sizes 0, 1, and 2. A size 1 brush handles most work. A size 0 or smaller helps with eyes and tiny details. A quality brush set pays for itself in frustration saved.
Paints — You need hobby-grade acrylic paints formulated for miniatures. Brands like Army Painter, Vallejo, and Citadel are reliable standards. They have the right pigment density and flow for thin, smooth coats. Avoid craft acrylics. They’re thick, chalky, and will ruin your miniature’s detail.
Primer — This is non-negotiable. You need a primer that bonds with resin. Acrylic spray primers from hardware or automotive stores work fine as long as they’re matte. Avoid gloss primers — they make paint slide off.
Palette — A wet palette is worth the small investment. It keeps your paints workable for hours instead of drying out in minutes. You can buy one or make your own with a shallow container, sponge, and parchment paper.
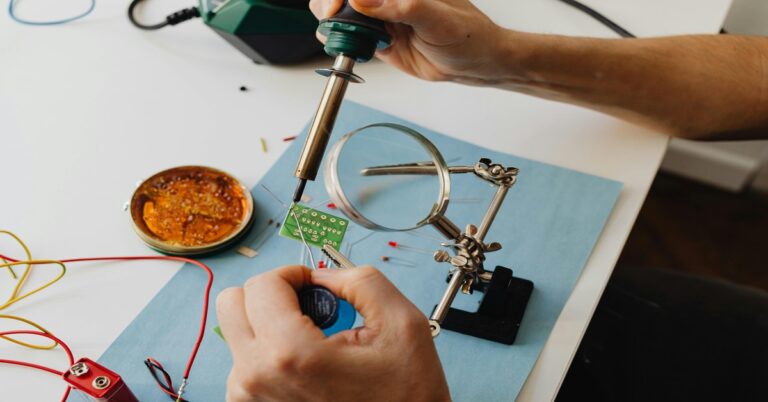
Magnifier or Hobby Lamp — Painting miniatures is delicate work. A good desk lamp with a daylight bulb helps you see what you’re doing. A magnifying headset or clip-on magnifier is even better for tiny details. For longer painting sessions, a hobby lamp with magnifier can reduce eye strain significantly.
Optional but Useful — A set of fine grit sanding sticks or micromesh files for smoothing print lines. A hobby knife for scraping supports. A bottle of flow improver or glaze medium to thin paints without destroying their consistency.
Step 1: Cleaning and Preparing Your Resin Miniature
This step is the most overlooked by beginners, and it’s also the most important. If your resin miniature isn’t properly cleaned and cured, nothing else will work well.
Start by removing all support structures. Use flush cutters for thick supports and a hobby knife for smaller contact points. Cut carefully to avoid gouging the model. Some supports leave small nubs or dimples. Those need to be filed down flush with the surface.
Next, clean the miniature in isopropyl alcohol (IPA). If you have a wash station or ultrasonic cleaner, use it. If not, a soft toothbrush and a jar of IPA work fine. Scrub gently to remove uncured resin from every recess and crevice. This step also removes the slippery film left by the printing process. Rinse in clean IPA and let it dry completely.
Once dry, cure the miniature under UV light. Most desktop curing stations cycle for 5–10 minutes. If you don’t have a curing station, you can leave it in direct sunlight for a few hours — just rotate it occasionally for even exposure.
Finally, inspect the model. Sand any visible layer lines with fine grit sandpaper or flexible sanding sticks. Pay attention to flat panels, curved surfaces, and areas where supports were attached. You don’t need a mirror finish, but you want smooth, consistent surfaces for paint to grip.
Skipping this step means you’ll see every layer line and support mark through your paint job later. Take the time now.
Step 2: Priming for Success
Priming is your bridge between raw resin and paint. Without it, your acrylic paint will bead up, slide around, or flake off. With it, you get a toothy surface that grabs every brush stroke.
For resin miniatures, I recommend a matte acrylic spray primer. Automotive primers from hardware stores work surprisingly well if they’re labeled as acrylic and matte. Hobby-specific primers from Citadel, Army Painter, or Vallejo are easier to find and formulated for smaller models, but they cost more per ounce.
When spraying, follow these rules:
- Shake the can vigorously for at least two minutes. Warm it slightly in a bowl of warm water if your room is cold. This prevents sputtering.
- Hold the can 10–12 inches from the miniature. Too close and you flood the detail. Too far and the primer dries before hitting the surface, creating a grainy texture.
- Spray in short, controlled bursts. Rotate the miniature between bursts. Don’t try to cover the whole model in one pass.
- Work in a well-ventilated area. Primer fumes are strong. A cardboard box turned on its side makes a passable spray booth.
Let the primer cure for at least a few hours. Overnight is better. If you rush this, the primer stays soft and your paint layers can pull it up during brush work.

Step 3: Base Coating and Layering
Base coating is where your miniature starts looking like something. The goal here isn’t perfection. It’s building a solid, even foundation of color that completely covers the primer.
Thin your paints. This is the single most important technique to learn. Unthinned paint goes on thick, obscures detail, and dries with visible brush marks. Instead, aim for a consistency similar to whole milk. Dip your brush in water, blot off the excess, then mix it into the paint on your palette. One part water to two parts paint is a decent starting point.
Apply the paint in thin coats. You’ll need two or three coats to get full opacity. That’s fine. Thin coats preserve the underlying detail and give you better control over color intensity.
Work from the inside out. Paint areas that are hard to reach first — like the areas behind arms, inside cloaks, or under raised weapons. Then move to visible surfaces. This prevents you from accidentally brushing over already painted areas and having to fix mistakes.
For beginners, a good brush set makes base coating much less frustrating. Look for brushes with good tip retention that can handle repeated thin paint applications without fraying. A size 1 brush with a sharp tip is your workhorse for this stage.
Step 4: Adding Depth with Washes and Shading
Washes are the cheat code of miniature painting. A wash is a very thin, heavily pigmented paint that flows into recesses and creates natural-looking shadows. One carefully applied wash can make a flat model look three-dimensional in seconds.
Store-bought washes are formulated with the right flow properties and pigment suspension. Brands like Citadel (Nuln Oil, Agrax Earthshade) and Army Painter offer ready-to-use washes that work great out of the bottle. They’re worth buying because homemade washes often lack the surface tension needed to flow properly and can leave splotchy residues.. For more on this, see our guide on 3D Printing for Kids: Safe and Educational STEM Projects.
To apply a wash, load your brush and touch it to the recesses. The wash will flow along creases, crevices, and panel lines naturally. Don’t flood the whole surface. Keep it controlled. If you get too much on an area, rinse your brush in clean water and wick the excess away.
Let the wash dry completely before proceeding. This takes about 10–15 minutes at room temperature. While it dries, the pigments settle into the shadows and the water evaporates, leaving crisp, defined depth.
Use washes selectively. A whole-model dunk in wash can make everything look muddy and dirty. Instead, target specific areas like the folds of a cloak, the recesses of armor plates, or the crevices between scales.
Step 5: Highlighting and Fine Detail Work
Once your wash is dry, the model might look a little flat in the raised areas. That’s where highlighting comes in. Highlighting brings back the brightness on edges and raised surfaces, restoring contrast after the wash darkened everything.
Dry brushing is the easiest highlighting technique for beginners. Dip a brush in a lighter shade of your base color, then wipe almost all of it off on a paper towel. Lightly brush the tip over raised surfaces. Only the high points pick up the paint. It’s fast, effective, and forgiving.
Edge highlighting is more precise. Use a brush with a sharp tip and a lighter shade thinned slightly. Run the side of the brush along sharp edges. This works great for armor panels, weapon blades, and mechanical parts.
For small details like eyes, gemstones, or buttons, keep these tips in mind:
- Steady your hands. Rest your wrists against your desk or brace the hand holding the miniature against your painting hand.
- Use a magnifier if you have one. It makes a huge difference for tiny details.
- Less paint is more. A tiny dot of paint on a size 0 brush is enough for an eye or a gem highlight.
Fine detail work is where patience pays off. You might mess up an eye and need to clean it up with your base color. That’s normal. Just keep going.
Common Beginner Mistakes and How to Avoid Them
Let’s save you some frustration. Here are the mistakes I see beginners make most often, including mistakes I made myself.
Using unthinned paint. This is the #1 issue. Thick paint hides detail, creates gloppy textures, and dries with visible ridges. Always thin your paint. Always.
Overloading the brush. Too much paint on your brush leads to uncontrolled application. You get pools where you don’t want them and missed spots where you do. Load your brush, then touch it to a paper towel to wick away the excess.
Ignoring mold lines or support marks. These imperfections become glaringly obvious after painting because the paint reflects differently on raised surfaces. Smooth them out before priming.
Applying wash too heavily. Thick wash pools in flat areas and leaves rings of pigment when it dries. Use less, and wick away any pools that form on flat surfaces.
Rushing the drying time. Acrylic paint needs time to cure. Wet paint behaves differently than dry paint. Putting a wash on top of a tacky base coat can pull up the layer underneath. Let each stage dry fully.
Using bad lighting. Painting under yellow or dim light makes it impossible to see your brush work clearly. Get a bright, white-light desk lamp. It fixes more problems than any technique change. A daylight-balanced desk lamp is a simple way to reduce these issues and improve accuracy.
Painting Techniques Comparison: Brush vs. Airbrush vs. Speed Painting
As you get comfortable with the basics, you’ll encounter other approaches. Here’s a practical comparison.
Traditional brush painting — This is what you’re learning in this guide. It gives you full control, works with any paint, and costs very little to get started. The tradeoff is time. Layering and highlighting with a brush takes patience and steady hands. For fine detail work, it’s still the gold standard.
Airbrushing — An airbrush excels at smooth gradients, large surface coverage, and priming. It makes base coating an entire army fast and consistent. But airbrushes are expensive, require a compressor, and take time to clean properly. They also struggle with fine details below a certain scale. Most painters use an airbrush for priming and base coats, then switch to a brush for detail work.
Speed painting (contrast paints, speed paints) — These are specialized acrylic paints designed to create base coat and shading in one coat. They flow into recesses like a wash but leave color on raised surfaces. They’re great for tabletop armies where you want good-looking results quickly. However, they work best on textured surfaces with lots of recesses. Flat panels can look uneven or blotchy. They’re also less forgiving than traditional layering for fine corrections.
Which is best? For a beginner focusing on fine detail, traditional brush painting is the right starting point. You learn fundamental skills that transfer to other techniques later. Add an airbrush or speed paints once you’ve built confidence with a brush.
Sealing and Protecting Your Finished Miniature
After all that work, you don’t want your paint job wearing off during a game or when you pick it up. Sealing locks in the paint and adds durability.
Use a spray varnish designed for miniatures or model kits. Choose between matte, satin, or gloss finishes:
- Matte removes shine and gives a realistic, flat look. Best for historical figures, fabric, and organic surfaces.
- Satin has a subtle sheen. Good for hybrid models with both metal and fabric.
- Gloss creates a shiny, reflective surface. Great for wet areas, eyes, or gems, but looks unnatural on most models if applied everywhere.
Most painters use matte or satin as an overall seal, then add gloss to specific details. Apply the varnish the same way as primer — light coats from 10–12 inches away. Heavy coats can cloud or frost the model, especially in humidity.
Brush-on varnishes also work if you don’t want to spray. They give you pinpoint control over finish areas. Frequent users may benefit from a bottle of matte varnish from a hobby brand like Vallejo or Army Painter — it’s a smart investment.

Display and Storage Tips for Painted Miniatures
Your finished miniature deserves better than getting thrown into a box. Paint is durable after sealing, but it’s still vulnerable to rubbing, scratching, and dust.
For display, use a glass-front cabinet or a simple shelf with a dust cover. Keep miniatures out of direct sunlight to prevent paint fading over months and years. If you’re showing them in a case, add a thin layer of foam or felt on the shelves to prevent sliding.
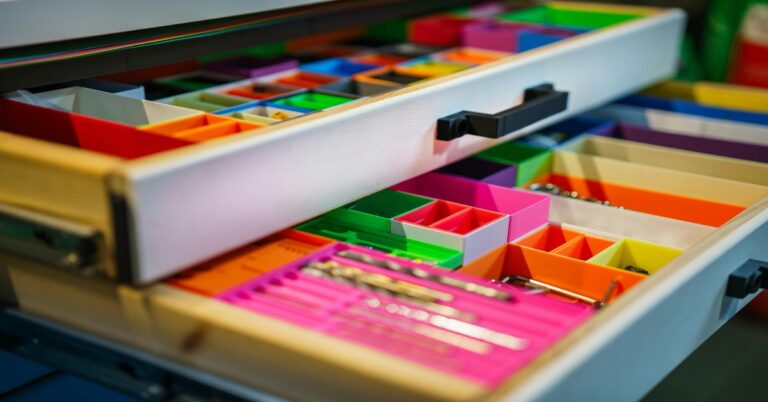
For storage during transport or gaming, foam trays with cutouts are the standard. Look for pluck-foam cases that let you customize the fit. Don’t pack miniatures loose in a bag — they will chip and scratch even with varnish. Magnetic storage with steel-lined cases is another popular option that holds miniatures securely without foam wear.
Handle painted miniatures by the base when possible. Even sealed paint can wear down from repeated handling on raised points like weapon tips or outstretched arms.
Final Thoughts and Next Steps
Painting 3D printed miniatures is a skill that gets better with every model you finish. Your first one might have messy highlights or a wash that pooled where you didn’t want it. That’s fine. The tenth one will look noticeably better. The hundredth will look like it came from a professional studio.
The key is to start. Clean and prime one miniature. Apply your base coats. Try a wash. Practice a dry brush highlight. Each step builds your confidence and your eye for detail. Before long, you’ll be mixing colors, blending transitions, and painting freehand symbols.
Ready to get started? Find your options for brush sets, starter paint kits, and hobby supplies online. The right tools make the process smoother, and they’ll last through many projects.. For more on this, see our guide on The Ultimate Guide to 3D Printed Musical Instruments: Best Filaments for Acoustics.
miniatures securely without foam wear. Handle painted miniatures
desk lamp. It fixes more problems than any technique change. A daylight-balanced desk