Best 3D Printer Kits for DIY Enthusiasts and Builders
Introduction
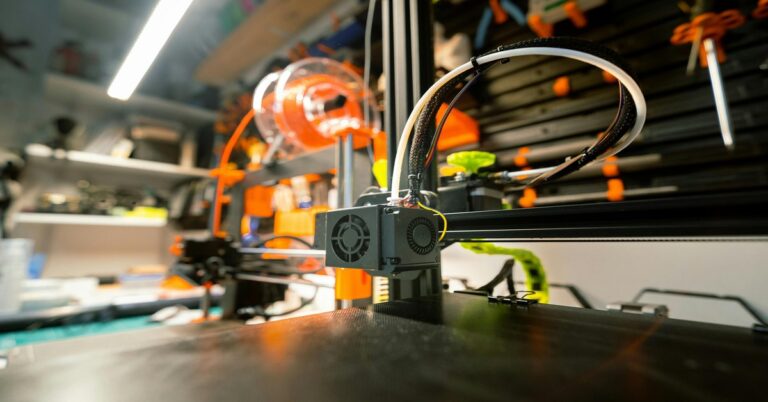
If you’re reading this, you probably already know that buying a pre-assembled 3D printer isn’t the only way to get started. For a lot of us, the real fun begins when you open a box full of extrusions, stepper motors, and a thousand small screws. Building your own printer from a kit isn’t just about saving money—it’s about understanding how every part works together. This article covers the best 3D printer kits for DIY enthusiasts, what to look for before you buy, and the common mistakes that trip people up on their first build. I’ve built and tested a handful of these kits over the years, including some that nearly drove me insane and others that clicked together almost perfectly. The goal here is to give you a practical, data-driven look at the options so you can pick a kit that matches your skill level and your project goals.
After working through this myself, I found a few things that textbooks don’t tell you.. For more on this, see our guide on Best Budget 3D Printers Under $300: High Quality on a Budget.

Why Build a 3D Printer Kit Instead of Buying Pre-Assembled?
There’s a real difference between buying a printer that’s ready to run out of the box and putting one together yourself. Kits are cheaper, usually by a decent margin. You also walk away with a much better understanding of the machine’s mechanics and electronics. That knowledge becomes invaluable when something breaks or you want to upgrade a part down the road. The satisfaction of seeing your first successful print from a machine you built with your own hands is hard to beat.
But it’s not all roses. Building a kit takes significant time—anywhere from a couple of hours to a full weekend or more, depending on the complexity. You’ll need patience and a willingness to troubleshoot. Mistakes in assembly can lead to poor print quality or even damage to components. If you’d rather just start printing immediately, a kit might not be the right call.
Pros and Cons of Building a 3D Printer Kit
| Pros | Cons |
|---|---|
| Lower upfront cost compared to pre-built | Time investment for assembly (2–30+ hours) |
| Deep understanding of mechanical and electrical parts | Requires troubleshooting skills |
| Easy to customize and upgrade later | Assembly errors can cause print failures or damage |
| Highly satisfying learning experience | Some kits have poor documentation |
Is a Kit Right for You? Quick Self-Check
- Are you comfortable with basic tools like Allen wrenches and screwdrivers? A quality metric hex key set makes the process much smoother.
- Can you dedicate several hours (or days) to assembly without rushing?
- Do you enjoy problem-solving and learning how things work?
- Are you prepared to follow detailed instructions, possibly with community help?
- If you answered yes to most of these, a kit is a solid choice. If not, a pre-assembled printer might save you a lot of frustration.
What to Look for in a 3D Printer Kit: Key Criteria
Not all kits are created equal. Before you pick one, you should understand the factors that affect print quality, ease of assembly, and long-term reliability. Here’s a breakdown of what matters most.
Build Volume
This is the maximum size of an object you can print. Smaller builds (around 220x220x250mm) are fine for most hobby projects. Larger volumes (300x300x400mm and up) let you print bigger functional parts but can be harder to keep accurate.
Frame Material
Aluminum extrusion frames are sturdy, square, and much more stable than acrylic or plastic frames. They resist vibration and keep the printer aligned over time. Avoid kits with acrylic frames if price allows. You want something that won’t warp or break mid-print.
Motion System
Most kits use either a Cartesian (traditional X/Y/Z gantry) or a CoreXY system. Cartesian is simpler and good for beginners. CoreXY is faster, more precise, and uses a more complex belt arrangement. Choose based on your comfort level and need for speed.
Hotend Type
All-metal hotends let you print higher-temperature materials like PETG and ABS without worrying about PTFE tubes degrading. PTFE-lined hotends are cheap but limit you to lower temperatures. If you plan to print anything beyond PLA, an all-metal hotend is a worthwhile upgrade.
Heated Bed
Essentially mandatory for printing materials other than PLA. Good kits include a heated bed with a flexible build surface for easy removal of prints. If it doesn’t come with one, plan on buying it separately. A flexible build plate is a simple upgrade that reduces print removal hassle.
Included Features
Touchscreen interfaces, auto bed leveling, silent stepper drivers, and filament runout sensors all make life easier. They aren’t essential, but they’re nice to have. Beginners benefit the most from auto leveling.
Community Support and Upgradability
A big, active community means better troubleshooting help and more mods. Upgradability matters because you’ll likely want to improve the printer over time. Look for kits with standard parts and an active forum or subreddit.
- Build Volume: Determine your typical print size
- Frame: Aluminum extrusion is preferred over acrylic
- Motion: Cartesian for simplicity, CoreXY for performance
- Hotend: All-metal for versatility
- Bed: Heated is important for material choice
- Features: Auto leveling, silent drivers, touchscreen
- Community: A strong community saves you hours
Something I noticed right away: the more expensive option isn’t always the better fit.
The 4 Best 3D Printer Kits for DIY Enthusiasts
After testing several kits and talking to other builders, here are the four that stand out for different reasons. I’ve focused on options that are actively available, well-supported, and offer a clear value proposition. Each is rated on assembly difficulty and print quality.
Kit #1: Creality Ender 3 V2 Kit – Best for Beginners
The Ender 3 V2 is probably the most popular 3D printer kit ever made. Assembly takes about 2 to 3 hours if you follow the manual carefully. The print quality is good for the price—not perfect out of the box, but with a bit of tuning you can get impressive results. The community around this printer is massive. You can find hundreds of upgrade guides, mods, and troubleshooting videos. Common first upgrades include better bed springs, an all-metal hotend, and a filament guide.
Key specs: Build volume 220x220x250mm, aluminum frame, Cartesian motion, PTFE-lined hotend, heated bed. Assembly difficulty: beginner. Print quality: 3/5.
Best for: Hobbyists on a budget who want a huge ecosystem of support and upgrades.
Tip during assembly: Pay close attention to squaring the frame during the base assembly. If it’s not square, your prints will shift. Use a small square or even a piece of paper to check alignment before tightening everything down.
Kit #2: Prusa MK4 Kit – Best for Reliability and Support
The Prusa MK4 kit is a precision instrument. Assembly takes longer—expect 8 to 12 hours—but the instructions are the best in the industry. Every part is pre-tested, and the kit includes thoughtful touches like color-coded wiring and separated bags for each assembly step. The print quality is excellent right from the start. Auto bed leveling works flawlessly, and the printer is remarkably low-maintenance after the build.
Key specs: Build volume 250x210x220mm, aluminum frame, Cartesian motion, all-metal hotend, heated bed, automatic bed leveling. Assembly difficulty: intermediate. Print quality: 5/5.. For more on this, see our guide on Best Professional 3D Printers for Small Business Prototypes.
Best for: Users who want a high-quality, reliable machine and don’t mind the longer build time in exchange for top-tier support and documentation.
Tip: Take your time with the belt tensioning step. Too loose leads to layer lines; too tight can strain the bearings. The manual provides a good method for this.
Kit #3: Voron 2.4 Kit – Best for Intermediate to Advanced Builders
The Voron 2.4 is not for the faint of heart. It uses a CoreXY motion system, has a large build volume (350x350x350mm is common), and can reach incredible speeds with good tuning. Assembly is a project—expect 20 to 30 hours at minimum. You’ll need to be comfortable with wiring, crimping connectors, and troubleshooting. The reward is a printer that can compete with industrial machines in terms of speed and accuracy.
Key specs: Build volume up to 350x350x350mm, aluminum frame, CoreXY motion, all-metal hotend, heated bed, automatic bed leveling. Assembly difficulty: advanced. Print quality: 5/5.
Best for: Experienced DIYers who want a high-performance custom printer and enjoy a challenging build.
Sourcing note: Sourcing individual Voron parts can be a headache. Many specialized suppliers offer complete kits that simplify the process significantly. It’s worth paying a bit more for the convenience.
Kit #4: Anycubic Vyper Kit – Best for Large Builds at a Value
The Anycubic Vyper gives you a large 240x240x260mm build volume with auto bed leveling out of the box. Assembly is relatively straightforward, taking 3 to 5 hours. Print quality is decent for the price—solid for a machine in this range. The community is growing, though not as large as Creality or Prusa. It’s a good middle-ground option for those who want a large format printer without the complexity of a Voron.
Key specs: Build volume 240x240x260mm, aluminum frame, Cartesian motion, PTFE-lined hotend, heated bed, auto bed leveling. Assembly difficulty: beginner to intermediate. Print quality: 4/5.
Best for: Users who want a large build volume and auto leveling without breaking the bank.
Trade-off: Community support is thinner. You’ll rely more on the manufacturer’s documentation and a few dedicated forums.

Comparison Table: All Recommended Kits at a Glance
| Kit | Price | Build Volume | Assembly Difficulty | Print Quality (1-5) | Best For |
|---|---|---|---|---|---|
| Creality Ender 3 V2 | $ | 220x220x250mm | Beginner | 3 | Beginners, massive community |
| Prusa MK4 | $$$ | 250x210x220mm | Intermediate | 5 | Reliability, top support |
| Voron 2.4 | $$$ | Up to 350x350x350mm | Advanced | 5 | High-performance custom builds |
| Anycubic Vyper | $$ | 240x240x260mm | Beginner-Intermediate | 4 | Large builds, value |
Still unsure? Jump back to the in-depth reviews for more detail on each model.
Common Assembly Mistakes and How to Avoid Them
After building several kits, I’ve made almost every mistake in the book. Here are the ones that cause the most trouble and how to sidestep them.
- Not squaring the frame: An un-squared frame leads to shifting layers and poor dimensional accuracy. Use a carpenter’s square on every corner during assembly. Check again after tightening all bolts.
- Overtightening screws: This strips threads and can crack plastic parts. Tighten until snug, then stop. A small torque wrench for small hex screws is a worthwhile investment.
- Misaligning belts: Belts that are too loose cause ringing and layer shifts. Too tight can damage bearings. The belt should twang like a low guitar string when plucked. Many kits have a tensioning guide in their manual.
- Skipping extrusion calibration: Not calibrating e-steps leads to under or over-extrusion. Follow the manual’s calibration procedure carefully. Most kits require you to send a command to extrude a set distance and then measure the actual amount.
- Skipping electrical checks: Always check for short circuits with a multimeter before powering up. Verify wiring for thermistor and heater cartridge polarity. A small mistake here can fry your mainboard.
If you run into trouble, search the specific kit’s name with your issue. Chances are someone else has solved it.
Essential Tools and Accessories for Building Your Kit
Before you start assembly, make sure you have these basics on hand. They’ll save you from stopping mid-build to hunt for tools.
- Allen wrench set with metric hex keys (1.5mm to 5mm)
- Small Phillips and flathead screwdrivers
- Digital calipers for measuring parts and calibration
- Flux and soldering iron if wiring is needed
- Multimeter for electrical checks
- Scissors and flush cutters for cable ties and filament
- Extra nozzles (0.4mm is standard, but 0.2mm and 0.6mm are useful)
- PTFE tube and cutter (for Bowden-style printers)
- Magnetic build plate for easier part removal
- Filament dryer (essential for damp filaments, especially nylon and PETG). A dedicated 3D printer filament dryer can prevent common extrusion problems caused by moisture.
Final Verdict: Which Kit Should You Build?
Choosing the right kit comes down to your experience level and what you want out of the printer. Here’s a straightforward decision tree.
- If you are a beginner and want the best community support: Go with the Creality Ender 3 V2. It’s cheap, well-documented, and you can upgrade it as you learn.
- If you value reliability and have the budget: Get the Prusa MK4. The build is longer, but the support and print quality are unmatched in the kit world.
- If you are an experienced builder seeking maximum speed and precision: The Voron 2.4 is for you. It’s a challenging build, but the results are spectacular.
- If you want a large build volume without the Voron complexity: The Anycubic Vyper strikes a good balance. You get auto leveling and a generous build volume for the price.
Whichever you pick, take your time during assembly, double-check your work, and enjoy the process. Read the in-depth reviews above to compare specs and features more closely. The right kit is the one that fits your skill level and your ambitions.
I’ve been through this process enough times to know that the best choice is the one you’ll actually use.

Here’s the bottom line: don’t overthink it. Pick the option that matches your current skill level and budget, and start making things. You can always switch later, but you can’t get back the time you spend comparing specs.. For more on this, see our guide on FDM vs Resin Printers: Which Technology Should You Buy First?.
Best Professional 3D Printers for Small Business Prototypes. Best