Industrial 3D Printers vs Desktop: When to Make the Switch
Introduction
Affiliate Disclosure: As an Amazon Associate, 3D Shopper earns from qualifying purchases. This does not affect our recommendations.
You’ve been printing prototypes, jigs, or maybe even small production batches on a desktop printer. It’s been reliable enough. But now you’re wondering if it’s time for something bigger, faster, and more capable. The question of industrial vs desktop 3d printer isn’t just about budget. It’s about workflow, materials, tolerances, and the kind of parts you actually need to make. This article breaks down the real differences between these two categories, covering cost, quality, speed, and the practical decision criteria that matter when you’re comparing your options. Whether you’re a hobbyist, a small business owner, or running a prototyping shop, the right choice depends on understanding where your current setup falls short and whether an upgrade actually solves the bottleneck.. For more on this, see our guide on Best IDEX 3D Printers for Productivity and Mirror Printing.

Defining the Two Categories: Desktop vs Industrial 3D Printers
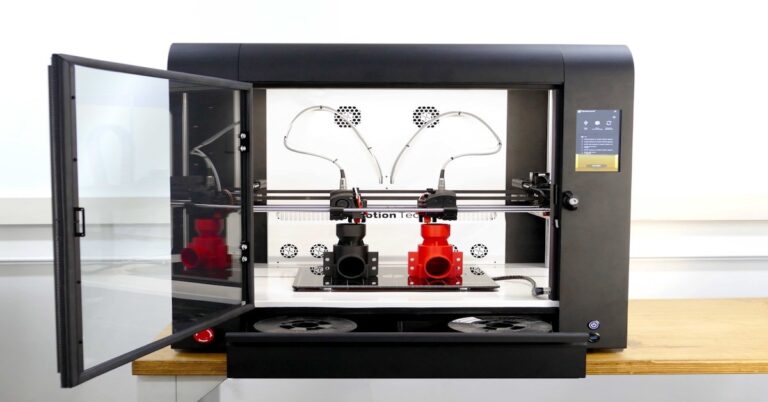
Let’s start with clear definitions. Desktop 3D printers are the machines you’re probably familiar with: open-frame FDM printers like the Creality Ender series, the Prusa i3 line, or more enclosed models like the Bambu Lab X1C. They range from around $200 to $3,000, have build volumes typically around 220x220x250mm, and primarily print PLA, PETG, TPU, and with some modifications, ABS or nylon. They’re versatile, affordable, and great for rapid iteration.
Industrial 3D printers are a different class entirely. These include large-format FDM systems like the Stratasys F370, industrial SLA/DLP machines like the Formlabs Form 3L, and powder-based systems like SLS or PolyJet. Prices start at $20,000 and go well past $200,000. They support advanced materials such as PEEK, PEKK, Ultem, carbon-fiber nylons, and certified production-grade resins. Build volumes are significantly larger, often 300x300x300mm or up to 1 meter or more. These machines are built for consistent reliability, tight tolerances, and production environments.
The key difference isn’t just price. It’s the entire support ecosystem: industrial machines come with dedicated service contracts, validated materials, and software that controls everything from build setup to quality reporting. Desktop printers are largely self-supported, with community forums and third-party filaments.
Build Volume and Scale: When Size Matters
This is often the first reason people consider an upgrade. A typical desktop FDM printer offers a build volume of about 220x220x250mm. That’s enough for most phone cases, brackets, and small figurines, but it’s tight for anything larger.
Industrial machines start at 300x300x300mm and go up to large-format units with 1,000mm or more in each axis. The practical implication is straightforward: can you print your part in one piece, or are you forced to split it into sections and glue or fasten them together? Splitting introduces seams, alignment issues, and potential weak points. For functional prototypes or end-use parts, that’s often unacceptable.
Quick comparison:
- Desktop (typical): 220x220x250mm – good for smaller parts, figure prints, and modular assemblies.
- Industrial medium: 300x300x300mm – handles larger brackets, enclosures, and single-piece tools.
- Industrial large: 600x600x600mm and up – ideal for ducting, large housings, and full-scale prototypes.
If you’re consistently printing parts that barely fit your desktop bed, or if you’re spending hours splitting and gluing, build volume is your first real signal to consider industrial. For those sticking with desktop printers, a machine with a larger build volume can help bridge the gap — consider something like a large format desktop 3D Printer Kit if you need more space without the full industrial commitment.
Material Constraints: What You Can Actually Print
Material choice is where the gap between desktop and industrial becomes a chasm. Desktop machines are excellent for PLA, PETG, and TPU. With some upgrades—like an all-metal hotend and enclosure—you can print ABS, polycarbonate, and basic nylon blends. But that’s roughly the ceiling.
Industrial machines unlock a completely different material set. Think PEEK, PEKK, Ultem (PEI), carbon-fiber reinforced nylons, glass-filled polycarbonate, and production-grade resins that meet ISO 10993 or UL 94 V-0 standards. These materials offer:
- Higher temperature resistance: PEEK parts can survive 250°C continuous use.
- Superior strength: Carbon-fiber nylons have higher stiffness-to-weight ratios than aluminum for some applications.
- Chemical and wear resistance: Essential for oil & gas, automotive, and industrial tooling.
- Certifications: Medical-grade biocompatibility and flame retardancy.
The material dictates the printer. You can’t print PEEK on a Creality Ender without serious modifications, and even then, reliability is poor. If your application requires a material with specific mechanical or thermal properties, that single requirement may force you into the industrial category. There’s no workaround. For example, if you’re designing an aerospace bracket that needs to survive near an engine, you’re looking at Ultem or PEEK, and that means an industrial printer.
Print Quality, Accuracy, and Tolerances
For a lot of prototype work, desktop printer quality is perfectly adequate. A well-calibrated Prusa or Bambu Lab X1C can deliver a 0.1mm layer height and dimensional accuracy within ±0.5mm. That’s enough for form-fit testing and cosplay parts.
Industrial machines operate in a stricter envelope. Expect layer resolutions of 0.05mm to 0.15mm, with dimensional tolerances controlled to ±0.1mm or better. This isn’t just about machine quality—it’s about the entire system. Heated chambers, active bed leveling, closed-loop motion control, and validated build profiles all contribute to repeatability.
Consider a snap-fit enclosure. On a desktop printer, you might need to dial in flow rate, temperature, and retraction settings for hours to get a lid that clicks on properly—and even then, the next print might shift slightly. On an industrial machine, that consistency is baked in. Your first print is likely to work, and the 100th will match the first.
If you’re making parts that must assemble without post-processing, or if your tolerances are tighter than ±0.3mm consistently, the industrial category starts making sense.

Speed and Throughput: Production vs Prototyping
Desktop printers typically move at 60-150mm/s with acceleration limits that keep them from being truly fast. Bambu Lab machines have pushed this boundary, but even they top out around 500mm/s for very specific geometries. Real-world print times for a moderately complex part on a desktop are often in the 10-20 hour range.
Industrial machines use heavier gantries, often with Linear Rails and ball screws, allowing faster acceleration and higher sustained speeds without sacrificing quality. They also incorporate features that improve throughput beyond pure speed:
- Multiple extruders for dual-material or dissolvable supports.
- Automated bed leveling and calibration cycles.
- Batch processing with interchangeable build plates.
- Network monitoring and remote job management.
Here’s a practical example. Printing a 200mm tall duct part on a desktop machine might take 18 hours, and you’ll need to remove supports and reset the print manually. The same part on a Stratasys F370 with soluble supports might take 14 hours, and the machine can start the next print automatically after a cycle. Over 50 parts, that’s 200 hours saved. When labor is involved, that time becomes real money.
Cost Breakdown: Initial Price, Materials, and Maintenance
This is the section most people skip to, but the sticker price only tells part of the story. Here’s a realistic breakdown:
Desktop 3D Printer Costs:
- Initial machine: $200 – $3,000
- Filament (standard): $20 – $50 per kilogram
- Filament (engineering): $50 – $100 per kilogram for nylon or polycarbonate blends
- Maintenance: Minimal – replacement nozzles ($5), PTFE tubes ($10), occasional bearings. Annual cost under $100.
- Software: Often free (Cura, PrusaSlicer) or low-cost
Industrial 3D Printer Costs:
- Initial machine: $20,000 – $200,000+
- Proprietary materials: $100 – $300 per kilogram
- Maintenance contract: $2,000 – $10,000 annually
- Software licenses: Often $1,000 – $5,000 per year
- Installation, training, calibration: $1,000 – $5,000 upfront
Cost-per-part example: Printing a 500g nylon bracket. On a desktop, 500g of material costs ~$25, print takes 15 hours, electricity adds $0.50. Total part cost: ~$30 in material and energy. On an industrial machine, the same 500g bracket might use a proprietary nylon costing $100, take 10 hours, but you add $20 of service contract overhead per print. Total: ~$140 per part. But the industrial part will have tighter tolerances, better layer adhesion, and likely fewer rejects. For a one-off prototype, desktop wins. For 100 end-use parts, the total cost per good part often favors the industrial machine once you account for scrap rate.. For more on this, see our guide on Auto-Leveling vs Manual Leveling: Is the Convenience Worth It?.
The Hidden Costs of Industrial 3D Printing
Before you jump, know that the machine cost is only the beginning. Industrial 3D printing brings several hidden expenses that catch many new buyers off guard:
- Power requirements: Many industrial FDM machines need 3-phase power. Single-phase converters add cost.
- Ventilation and fume extraction: Printing materials like Ultem or PEEK releases fumes that require active exhaust systems.
- Fire safety: High-temperature printing requires metal enclosures and sometimes fire suppression systems.
- Floor space: An industrial machine can weigh 500kg and need a dedicated reinforced floor area.
- Compressed air: Some systems need clean, dry compressed air for cooling or material handling.
- Post-processing equipment: SLS printers need separate stations for powder removal, media blasting, and dyeing.
- Operator training: You can’t hand a $100,000 machine to someone who only knows Cura. Certification takes time.
These aren’t dealbreakers, but they often double the true cost of an industrial system in the first two years. If you’re not prepared for this, you’re better off staying with desktop machines and outsourcing the occasional large or exotic-material part.
When to Stick with Desktop 3D Printing
There are plenty of valid reasons to stay with desktop printers. Here’s when it makes sense:
- You’re prototyping small parts (under 200mm in any dimension).
- Your material requirements are met by PLA, PETG, ABS, or standard nylon.
- You produce low volumes—under 100 parts per month.
- You’re in early iteration phases where design changes are frequent.
- Your budget is under $10,000 and you can’t justify ongoing service contracts.
- You’re running a classroom, workshop, or small maker space.
Desktop machines have improved dramatically. A Prusa XL with a heated chamber can handle polycarbonate and nylon. The Bambu Lab X1C prints carbon-fiber-reinforced PAHT-CF out of the box. These machines blur the line between desktop and industrial without the overhead. For many small businesses, these represent the sweet spot. If you need advanced materials but only in small quantities, a high-end desktop machine is often the better buy than even the most entry-level industrial system. Users looking for a reliable upgrade that handles tougher materials might want to explore a high temperature 3D printer filament to get more out of a desktop setup.
Clear Signs It’s Time to Go Industrial
When should you make the leap? Look for these concrete indicators:
- Material requirement: You need to print PEEK, Ultem, PEKK, or other high-performance thermoplastics.
- Throughput demand: You need to produce 200+ functional parts per month with minimal operator attention.
- Repeatability standards: Your parts must have consistent tolerances across multiple print runs, day after day.
- Tight tolerance requirements: You need ±0.1mm or better on critical features without post-machining.
- Regulatory compliance: Your parts must meet standards like ISO 10993 (biocompatibility), UL 94 (flame retardance), or AS9100 (aerospace).
- Workflow automation: You need to queue jobs remotely, monitor multiple machines, and integrate with MRP systems.
Quick checklist:
- ☐ Is your current material limiting part function?
- ☐ Are you rejecting more than 10% of prints due to inconsistency?
- ☐ Are you spending more time calibrating than designing?
- ☐ Do you have recurring orders for parts that need certification?
If you answer yes to even one of these, it’s worth exploring industrial options.

Comparing Specific Industrial and Desktop Models ( Edition)
Here’s a look at some notable machines in each category as of .
Desktop Machines:
- Bambu Lab X1 Carbon: Fast, enclosed, supports PAHT-CF, PET-CF, and polycarbonate. ~$1,449. 256x256x256mm build volume. Great for advanced materials without the industrial price.
- Prusa XL: CoreXY with heated chamber, 360x360x350mm build, multi-head upgrade. ~$2,500 for the base model. Excellent for large nylons and polycarbonate.
- Creality K1 Max: 300x300x300mm, fast CoreXY motion, enclosed, ~$999. A budget-friendly option for larger prints with moderate material demands.
Industrial Machines:
- Formlabs Fuse 1+: SLS printer, 165x165x300mm build, uses nylon powders. ~$20,000. Excellent for end-use parts without supports.
- Stratasys F370: FDM, 355x355x355mm, supports ABS-M30, PC, ULTEM 9085. ~$60,000. Known for high repeatability and soluble supports.
- Markforged X7: FDM with continuous Carbon Fiber reinforcement, 330x250x200mm. ~$75,000. Produces parts with strength comparable to aluminum.
These represent different price points and capabilities. The desktop machines on this list handle advanced materials. The industrial machines offer production-grade consistency and material certification. Your choice depends on which of those factors matters more for your parts.
How to Calculate the ROI of Upgrading
You shouldn’t upgrade based on gut feeling. Run a simple calculation:
ROI = (Total savings per month) / (Additional monthly cost of industrial)
Example scenario:
- A small business prints 200 functional parts per month.
- Each part takes 5 hours on a desktop machine with a 30% failure rate (meaning 260 hours of print time to get 200 good parts).
- On an industrial machine, each part takes 3 hours with a 5% failure rate (630 hours for 200 good parts).
- Time saved per month: 260 hours – 630 hours = 197 hours.
- At a $50/hour loaded labor rate, that’s $9,850 saved per month in labor.
- Add faster time-to-market value (estimated $2,000/month).
- Total monthly benefit: ~$11,850.
- Additional costs: industrial machine lease ($2,000/month) + materials ($1,000 more expensive) + maintenance ($800/month) = $3,800/month.
- Net monthly benefit: $8,050.
- If the machine cost $75,000, payback period is roughly 9 months.
Adjust the numbers for your own situation, but this framework gives you a rational basis for the decision.
Common Pitfalls When Switching to Industrial
Moving from desktop to industrial isn’t just plug-and-play. Here are mistakes I’ve seen people make:
- Underestimating post-processing: SLS parts need powder removal and often dyeing. FDM parts may need vapor smoothing. Industrial adds overhead, not just speed.
- Ignoring material lead times: Industrial materials are often proprietary and may have 2-4 week lead times. You can’t grab them from Amazon.
- Not training staff: Handing an industrial machine to someone used to desktop printers is a recipe for failed prints and damage.
- Skipping the service contract: When an industrial printer goes down, you lose production. Service contracts are expensive, but cheaper than downtime.
- Over-specifying build volume: Buying a 1-meter build volume when you only need 400mm wastes money and floor space. Choose the machine that matches your largest typical part, not your theoretical maximum.
These are real costs that aren’t reflected in the brochure. Acknowledge them upfront to avoid buyer’s remorse.
Final Verdict: Making the Switch That Fits Your Workflow
There is no universal best here. The right choice depends entirely on your parts, materials, volume, budget, and risk tolerance. Desktop printers are incredibly capable today, especially models like the Prusa XL or Bambu Lab X1C that handle advanced thermoplastics. They’re perfect for low-volume, high-iteration, or small-part work. Industrial printers justify their cost when you need production-grade materials, repeatable tolerances, and high throughput with minimal failure.
If you’re uncertain, don’t jump to industrial immediately. Start with a high-end desktop machine that stretches into advanced materials. See if it covers 90% of your needs. If it does, you saved $50,000. If not, you’ll have clear data to spec your next industrial machine.
Compare these top desktop and industrial models to find your next machine. Evaluate build volume, material support, and total cost of ownership. That’s the path to a decision you won’t regret.
Here’s the bottom line: don’t overthink it. Pick the option that matches your current skill level and budget, and start making things. You can always switch later, but you can’t get back the time you spend comparing specs.. For more on this, see our guide on FDM vs Resin Printers: Which Technology Should You Buy First?.