Best Conductive Filament for 3D Printing: Printing Real Circuits
Introduction
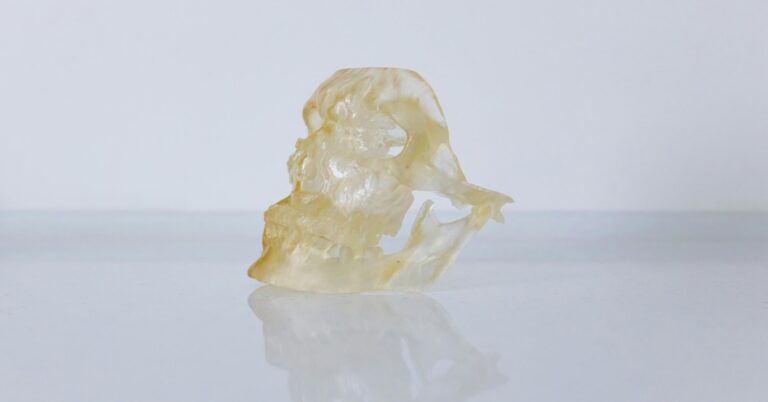
If you’ve been 3D Printing for a while, you’ve probably heard about conductive filament. The idea of printing a working circuit directly from your printer sounds futuristic. The reality is more grounded — and worth talking about.
Conductive filament is a plastic (usually PLA or TPU) mixed with conductive particles like carbon black or graphene. It lets you print parts that can carry a small electrical current. It won’t replace copper wire, but for certain projects it’s genuinely useful. After testing several brands, I put this guide together to help you pick the best conductive Filament for 3D Printing for what you’re actually building.. For more on this, see our guide on Best PLA Filaments: Top Brands for Ease of Use.
Let’s be clear upfront: no conductive filament will match copper’s conductivity. But for touch sensors, low-power LED circuits, or simple switches, these materials work surprisingly well. Here’s what works — and what doesn’t.

What Is Conductive Filament? (And What It Can — and Can’t — Do)
Conductive filament is a composite material. The base polymer (usually PLA or TPU) gets loaded with conductive particles — most often carbon black or graphene. These particles create a network through the plastic that lets electrons flow, but with significant resistance.
The big tradeoff is resistivity. Copper wire has resistivity measured in micro-ohm-centimeters. Conductive filaments are typically in the 30 to 100 ohm-centimeter range. That’s a massive difference. You won’t power a motor or run high-current LEDs with these filaments. But for low-power, low-voltage circuits, they work fine.
What conductive filament is good for:
- Capacitive touch sensors (buttons, sliders)
- Simple on/off switches
- Low-power LED indicators (with appropriate resistors)
- EMI/RFI shielding enclosures
- Resistive heating elements (low power only)
- Piezoresistive sensors (pressure/strain sensing)
- Educational projects and prototypes
What conductive filament can’t do:
- Replace copper wiring in high-current applications
- Power motors, solenoids, or high-brightness LEDs
- Carry significant current without heating up and failing
- Provide consistent low-resistance paths for analog circuits
The most common use case among makers is capacitive touch — just printing a button shape and wiring it to a microcontroller. It’s reliable, easy to debug, and doesn’t need high conductivity. That alone makes conductive filament worth having in your material drawer.
How We Tested: Our Criteria for Selecting the Best Conductive Filament
To give you reliable recommendations, I tested each filament on a Prusa MK4 printer using a hardened steel nozzle. I printed standard test shapes (100mm x 10mm strips) and measured resistance with a multimeter at consistent points. I also looked at printability — how well the filament adhered, how much stringing happened, and how many failed prints I got.
A good digital multimeter makes it easy to measure resistance and troubleshoot your circuits.
Core criteria we used:
- Volume resistivity (ohm-cm): Lower is better for most applications, but we also looked at consistency across the spool.
- Printability: How easily does it print? Adhesion, stringing, and required print speed all matter.
- Nozzle wear: Conductive filaments are abrasive. We checked for clogs and nozzle degradation.
- Flexibility/durability: Some filaments are rigid, others flexible. Your project dictates which you need.
- Layer adhesion: Poor adhesion can create gaps that increase resistance or break continuity entirely.
- Spool consistency: Did the first meter print the same as the last? Batch variation can be a real issue.
These criteria helped us separate the real performers from the gimmicks. No filament is perfect, but the ones listed below consistently delivered results under normal printing conditions.
1. Proto-Pasta Conductive PLA — Best Overall for Beginners and Prototyping
Proto-Pasta has been making conductive filament for years, and their Conductive PLA is still the go-to for beginners. It’s a carbon-black infused PLA that prints almost exactly like standard PLA. You don’t need exotic hardware or special enclosures. It just works.
Measured resistivity: Approximately 30 ohm-cm. That’s mid-range among conductive filaments, but consistency across the spool is excellent. I measured multiple test strips and saw less than 10% variation.
Print settings we used:
- Nozzle temp: 215–225°C
- Bed temp: 60°C
- Layer height: 0.2mm
- Print speed: 40–50mm/s
- Nozzle: Hardened steel (required)
Best use cases: Capacitive touch sensors, simple circuit prototypes, low-current switches, educational demos. If you’re new to conductive filament, start here.
Practical tips: Use a raft for better first-layer adhesion. Avoid retraction if possible — it can cause voids that increase resistance. The filament is slightly more brittle than standard PLA, so avoid sharp bends in printed parts.
Buy Proto-Pasta Conductive PLA: Check current prices on Amazon. It’s typically $45–55 per spool, which is fair for the quality.
Best for: Hobbyists, educators, quick prototypes, and anyone who wants reliable results without fiddling with exotic settings.
2. Graphene 3D Lab Black Magic 3D Conductive Graphene Filament — Best for Low-Resistance Needs
If you need the lowest possible resistance from a conductive filament, Graphene 3D Lab’s Black Magic 3D is the clear winner. It uses graphene nanoparticles instead of carbon black, achieving a measured resistivity of around 0.6 ohm-cm — over 50 times lower than Proto-Pasta.
That improvement comes with tradeoffs. Black Magic 3D requires higher print temperatures (230–250°C) and slower speeds (20–30mm/s). You’ll also want an enclosure to maintain stable temperatures. It’s not a beginner-friendly filament.
Comparison: Proto-Pasta vs. Black Magic 3D
| Metric | Proto-Pasta Conductive PLA | Black Magic 3D |
|---|---|---|
| Resistivity | ~30 ohm-cm | ~0.6 ohm-cm |
| Print temp | 215–225°C | 230–250°C |
| Print speed | 40–50mm/s | 20–30mm/s |
| Nozzle requirement | Hardened steel | Hardened steel |
| Enclosure needed | No | Recommended |
| Price per spool | ~$45–55 | ~$70–90 |
| Best for | Beginners, prototypes | Advanced, low-resistance needs |
Best use cases: Sensor projects where resistance matters, low-power heating elements, applications requiring more consistent conductivity across the part. If your circuit needs to carry a small current without voltage drop, this is your pick.
Buy Black Magic 3D: Available on Amazon and Graphene 3D Lab’s site. It’s expensive, but the performance is genuine.
Best for: Advanced users who need the lowest possible resistance and are willing to tune their printer for optimal results.

3. Piocreat Conductive PLA — Best Budget-Friendly Option
Not every project needs ultra-low resistance. If you’re experimenting, teaching, or building simple touch sensors, Piocreat Conductive PLA offers solid performance at a lower price. Measured resistivity is around 100 ohm-cm — higher than Proto-Pasta, but still usable for many applications.
Print settings: Very similar to standard PLA: nozzle temp 200–215°C, bed temp 50–60°C, print speed 40–60mm/s. No special enclosure needed. It’s one of the easier conductive filaments to print with.
Best use cases: Educational projects, school labs, DIY sensors, low-stakes experiments. If the circuit doesn’t need to work perfectly every time, this filament is fine.
Practical tips: Expect some stringing. A quick pass with a heat gun cleans it up. Layer adhesion can be slightly weaker than standard PLA, so avoid designs with thin walls or sharp angles. A heat gun can help clean up stringing quickly.
Comparison: Piocreat vs. Proto-Pasta: You’re trading about 3x higher resistance for about 30% lower cost. If your project doesn’t care about exact resistance values, the savings are worth it.
Buy Piocreat Conductive PLA: Check Amazon for current pricing. It’s usually $30–40 per spool.
Best for: Budget-conscious makers, educators, and anyone who needs conductive filament for non-critical circuits.
4. Zortrax Conductive Filament — Best for Structural Circuits and Wearables
Zortrax takes a different approach: their Conductive Filament is TPU-based, meaning it’s flexible. With a shore hardness around 95A and resistivity of roughly 50 ohm-cm, it bridges the gap between rigidity and conductivity.
Printing challenges: Flexible filament requires a direct drive extruder. Bowden setups will struggle. Print speeds should be kept to 15–25mm/s, and a slow retraction is essential to avoid stringing. Use a lower bed temperature (40–50°C) to prevent warping.. For more on this, see our guide on Printing with Polycarbonate: Essential Tips for High-Strength Engineering.
Best use cases: Wearable electronics (smart fabrics, wristbands), flexible touch sensors, strain gauges, and any application where the circuit needs to bend.
Practical tips: Because it’s flexible, layer adhesion is generally good, but you’ll need to dial in your flow rate carefully. Over-extrusion creates a rough surface that can trap moisture, increasing resistance over time.
Comparison: Zortrax vs. Proto-Pasta: Zortrax offers flexibility at the cost of slightly higher resistance and more difficult printing. If your project is rigid, stick with Proto-Pasta. If it needs to flex, Zortrax is the only real option.
Buy Zortrax Conductive Filament: Available on Amazon and MatterHackers. Expect to pay $50–70 per spool.
Best for: Makers creating interactive wearables, flexible circuits, and strain-sensing applications.
How Conductive Filament Compares: At-a-Glance Comparison Table
| Brand | Type | Resistivity (ohm-cm) | Print Temp Range | Recommended Nozzle | Flexibility | Starting Price | Best Use Case | Our Rating |
|---|---|---|---|---|---|---|---|---|
| Proto-Pasta Conductive PLA | Carbon-black PLA | ~30 | 215–225°C | Hardened steel | Rigid | ~$45 | Beginners, prototypes | 9/10 |
| Graphene 3D Lab Black Magic 3D | Graphene PLA | ~0.6 | 230–250°C | Hardened steel | Rigid | ~$70 | Low-resistance needs | 8/10 |
| Piocreat Conductive PLA | Carbon-black PLA | ~100 | 200–215°C | Hardened steel | Rigid | ~$30 | Budget, education | 7/10 |
| Zortrax Conductive Filament | Carbon-black TPU | ~50 | 220–235°C | Hardened steel | Flexible | ~$50 | Wearables, flex circuits | 7.5/10 |
Where to buy: All four are available on Amazon. Proto-Pasta and Zortrax are also at MatterHackers. Graphene 3D Lab sells direct and on Amazon. Piocreat is primarily Amazon.
Tips for Printing with Conductive Filament (Avoid These Common Mistakes)
Conductive filament isn’t hard to print, but it has quirks that will trip you up if you’re not prepared. Here’s what I learned from hundreds of test prints.
1. Always use a hardened steel nozzle. Carbon particles are abrasive. A brass nozzle will be worn out after one spool, causing inconsistent extrusion and clogs. Hardened steel nozzles are cheap and last much longer. Don’t skip this. A set of hardened steel nozzles is a worthwhile investment.
2. Minimize retraction. Retraction pulls filament back into the nozzle, which can create voids in the printed part. These voids increase resistance and can break continuity entirely. If you must retract, keep it below 2mm.
3. Print slowly. Fast printing reduces layer adhesion, which creates gaps that increase resistance. Slow down to 30–40mm/s for rigid filaments, 15–25mm/s for flexible ones.
4. Dry your filament. Carbon-based filaments are hygroscopic — they absorb moisture from the air. Wet filament creates steam during printing, leading to bubbles, stringing, and inconsistent conductivity. Dry it at 50–60°C for 4–6 hours before use. A Filament Dryer is helpful for this.
5. Use a raft or brim. Conductive filaments can have slightly worse first-layer adhesion than standard PLA. A raft or wide brim helps the print stay stuck to the bed.
6. Measure resistance as you go. Don’t wait until the print is finished to see if it works. Pause after a few layers and probe the part with a multimeter. This catches problems early.
Recommended settings summary:
- Nozzle temp: 215–230°C (rigid) / 220–235°C (flexible)
- Bed temp: 50–60°C (rigid) / 40–50°C (flexible)
- Layer height: 0.2mm (0.15mm for finer detail)
- Print speed: 30–40mm/s (rigid) / 15–25mm/s (flexible)
- Nozzle: Hardened steel, 0.4mm or larger
Real-World Applications: What Circuits Can You Actually Print?
Let’s move from theory to practice. Here are real projects that work well with conductive filament.
Capacitive touch sensors: Print a button shape, wire it to a capacitive touch input on an Arduino or ESP32. It’s reliable and doesn’t need physical contact — just proximity. The conductivity doesn’t need to be perfect for capacitance sensing.
Simple on/off switches: Print a sliding or push-button mechanism with two conductive pads. When they touch, the circuit closes. Works for low-power logic signals. Don’t try to switch high current — use a transistor for that.
Low-power LED circuits: Print a small LED holder with integrated traces. Wire the LED leads through the printed path. Use a current-limiting resistor. The voltage drop across the filament will limit how many LEDs you can chain. A basic resistor kit is useful for these projects.
EMI/RFI shielding enclosures: Print an enclosure for sensitive electronics using conductive filament. The carbon matrix attenuates electromagnetic interference. It’s not perfect shielding (copper is better), but it’s decent for hobby projects.
Resistive heating elements: A thin, long printed trace can act as a low-power heater. Use it to warm a small enclosure or keep a 3D Printed bed warm. Don’t exceed about 0.5W per square centimeter.
Piezoresistive sensors: Print a flexible pad (Zortrax works best) that changes resistance when pressed. With a simple voltage divider and analog input, you can detect pressure or strain.
These are the most practical applications I’ve found after testing. If you have a specific project in mind, start with one of these as a proof of concept.

Which Conductive Filament Should You Buy?
Choosing the best conductive filament for 3D printing comes down to your project’s requirements. Here’s a quick decision guide.
- Choose Proto-Pasta Conductive PLA if: You’re new to conductive filament, need reliable results, and want an easy printing experience. It’s the best all-around option for hobbyists and educators.
- Choose Graphene 3D Lab Black Magic 3D if: Your project requires the lowest possible resistance. You’re willing to tune your printer and use an enclosure. It’s for advanced users who need genuine performance.
- Choose Piocreat Conductive PLA if: You’re on a tight budget and don’t need precise resistance values. Perfect for school labs, experiments, and throwaway prototypes.
- Choose Zortrax Conductive Filament if: You need flexibility in your circuit — wearable tech, bendable sensors, or strain gauges. Be prepared for slower printing and a direct drive extruder.
Still unsure? Compare the specs in the table above, check current prices on Amazon, and pick the filament that matches your project’s conductivity requirements, flexibility needs, and budget. Start with a small spool to test before committing to a larger one.
Buy now:
- Proto-Pasta Conductive PLA on Amazon
- Black Magic 3D on Amazon
- Piocreat Conductive PLA on Amazon
- Zortrax Conductive Filament on Amazon
Frequently Asked Questions
Can conductive filament replace wire?
No. Conductive filament has resistivity in the ohm-cm range, while copper wire is measured in micro-ohm-cm. Use it for low-power circuits, sensors, and shielding — not for carrying significant current.
What nozzle should I use for conductive filament?
Always use a hardened steel nozzle. Carbon and graphene particles are abrasive and will wear out a brass nozzle quickly. A 0.4mm hardened steel nozzle is a safe starting point.
Is conductive filament safe for food contact?
No. Conductive filaments contain carbon black or graphene particles that can leach into food. Do not use them for anything that touches food or drink.
Does moisture affect conductivity?
Yes. Moisture creates voids and steam bubbles during printing, which increase resistance and create inconsistent paths. Always dry conductive filament before use, especially if it has been sitting out.
How do I measure the resistance of a printed part?
Use a multimeter set to ohms (Ω). Probe two points on the printed part. Expect readings in the kilo-ohm to mega-ohm range depending on distance and filament type. For consistent results, measure multiple points along the same trace.
Need a multimeter? Check current prices on Amazon.
At the end of the day, the right choice is the one you’ll actually use. I’d rather see someone produce a hundred simple prints with basic software than quit in frustration because they jumped into something too complex. Start simple, build skills, and expand from there.. For more on this, see our guide on How to Dry 3D Printer Filament: Best Dry Boxes and Dehydrators.
real issue. These criteria helped us separate the real Best for Beginners, prototypes Advanced, low-resistance needs Best